Sketching project
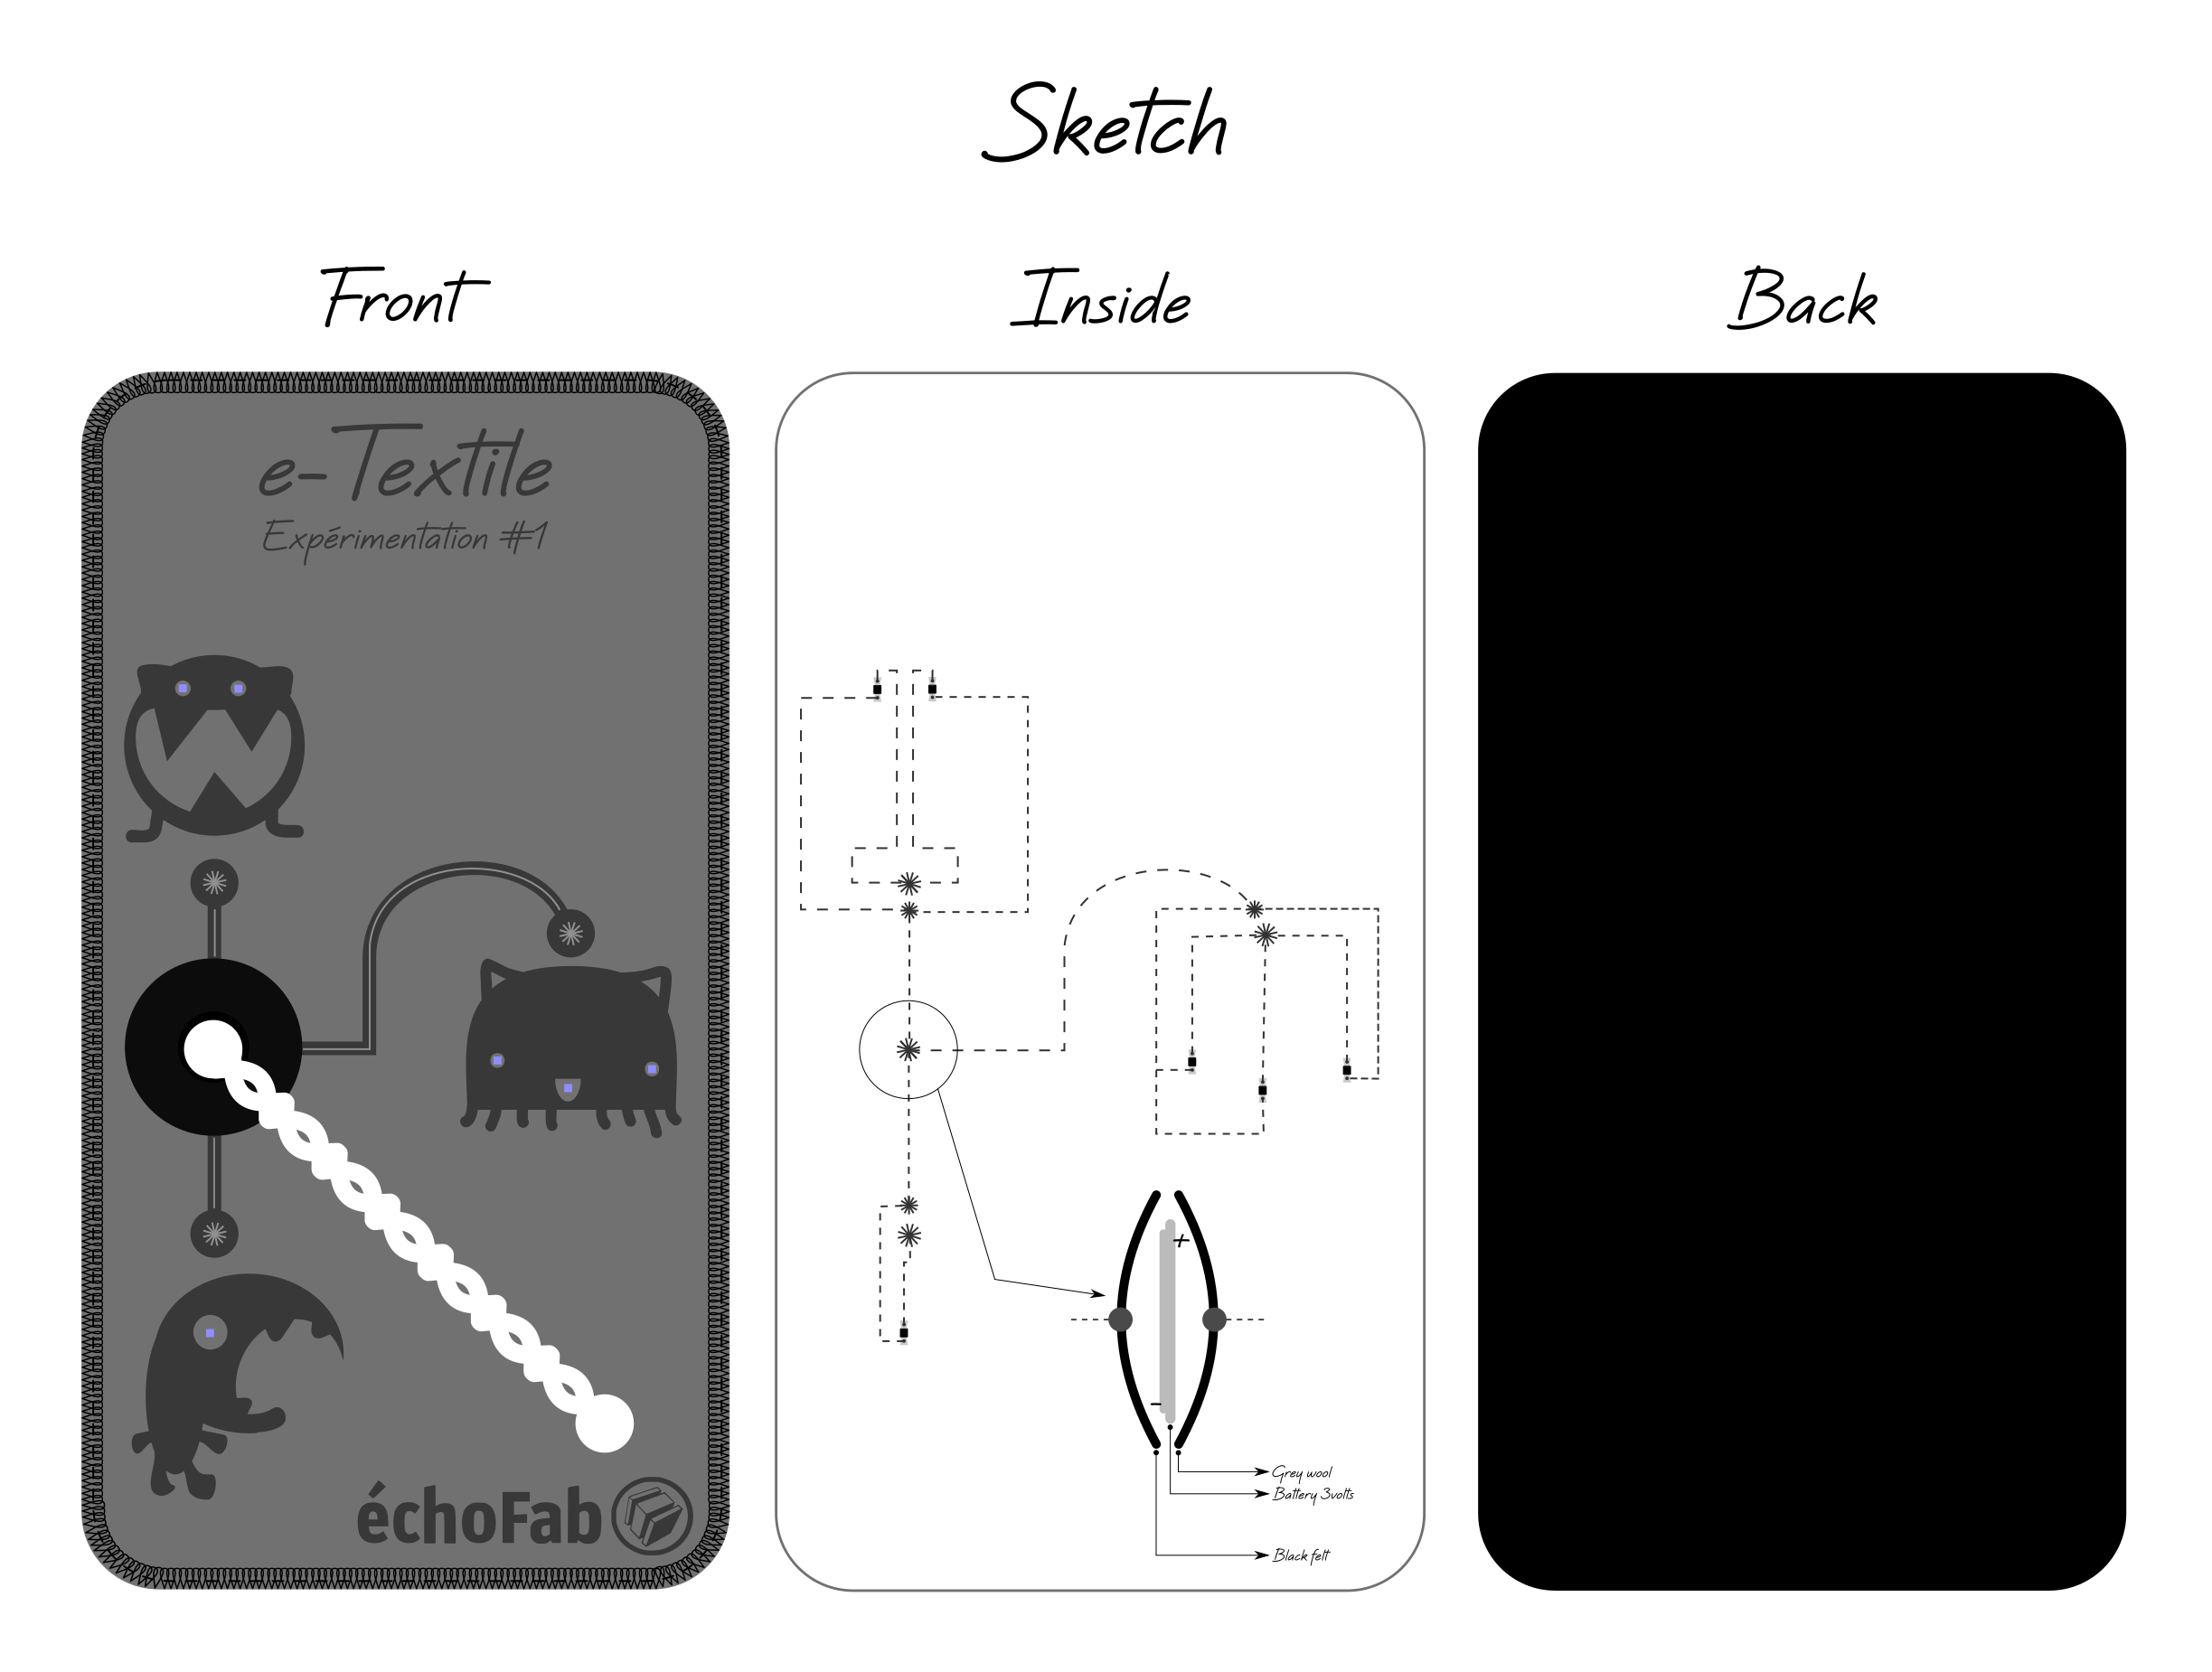
To me, the first step is to explore the simple exercise that has been given to us and just to make the first sensor in a soft circuit. So, I need to understand what the small project will look like so I can plan my "BoM". The best way is to sketch it as I show just below. Then, I'll be able to produce and plan a "BoM" and reunite all the component needed in the lab.
- Black felt, about 20"x10"
- White felt, about 4"x3"
- Grey wool, about 20"x10"
- 5x White LED (160-1737-1-ND)
- Woven conductive fabric about 3" x 3"
- Medium conductive Thread
- Interlining about (20"x10")
- Flat 3 volts battery
- White decorative rope
Well, at first I tried to figure everything I needed all in once without any sketch, I wanted to make it fast. I got confused really fast and came back to a more structured way of doing a project. Even if for a small project to me, it definitely worth the time to well sketch what I'm going to make. It would surprise me a lot that based on this sketch something would go wrong. The design as the circuit as been thought very well. I the sketching part has been thought well, I should make the project only once and save time as well!
Desiging the pieces
To make that project I need to laser cut the majority of the pieces so here's a look at the plans. For the font, I used "quinzey" and as I didn't have enough time to make those little monster myself, I took them on an open source website for vectors and icons. Here's the credit for those small monsters too.
- Monster 1 : Icons made by Freepik from www.flaticon.com is licensed by CC 3.0 BY
- Monster 2 : Icons made by Freepik from www.flaticon.com is licensed by CC 3.0 BY
- Monster 3 : Icons made by Freepik from www.flaticon.com is licensed by CC 3.0 BY
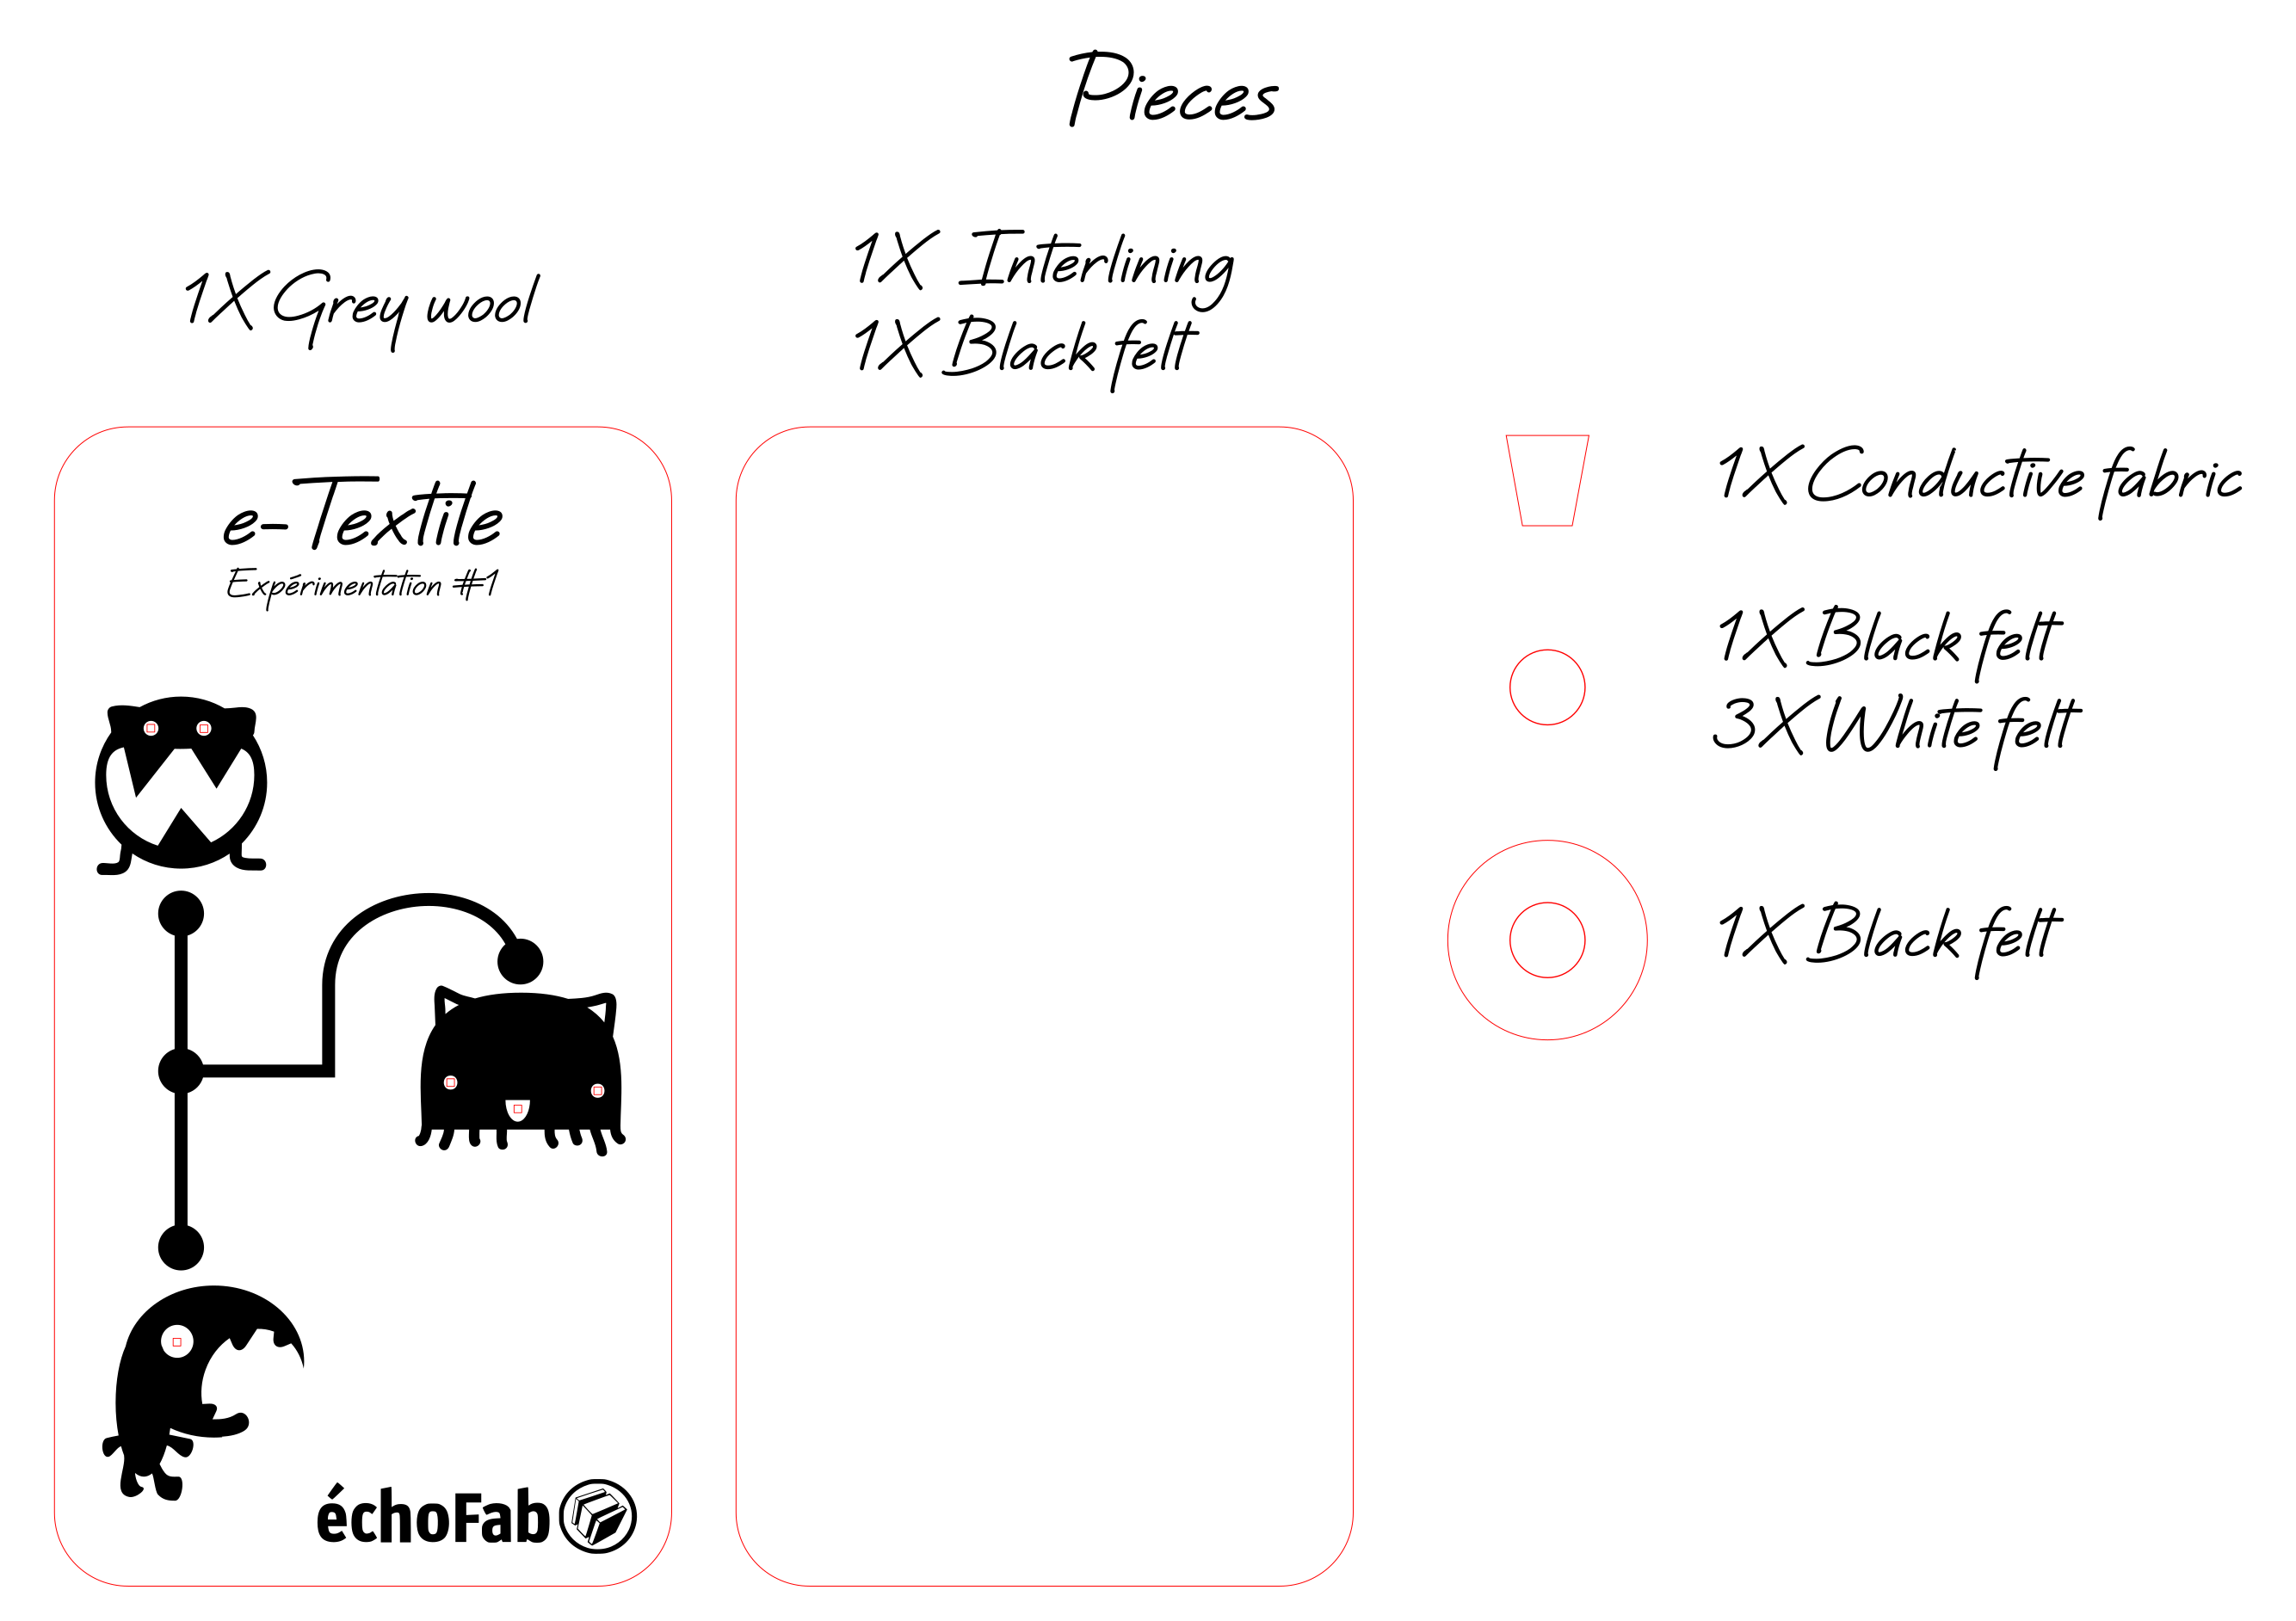
Then, I cut the with rope. Three pieces of 10" that'll be braid later.
Building the prototype
1. Laser cut and engrave the pieces
I just took the prepared files and put them in the lasercutter. It was all about knowing the machine and select the best settings. Fortunatly, I do know that machine very well so I came up with the best setting right away. Here they come ! Keep in mind that those setting are for a Trotec's speedy 300, 60 watts.
- Felt : power = 55; speed = 15; frequency = 500
- Wool cutting : power = 60; speed = 10; frequency = 1000
- Wool engraving : power = 80; speed = 80; frequency = 1000
- Interlining : power = 60; speed = 10; frequency = 1000
At the end of this phase, I thermofixed the interlining with the main material. I choose to put interlining jsut because I already know that those demos will be thoutch a lot and I wanted to make it a little more rough.
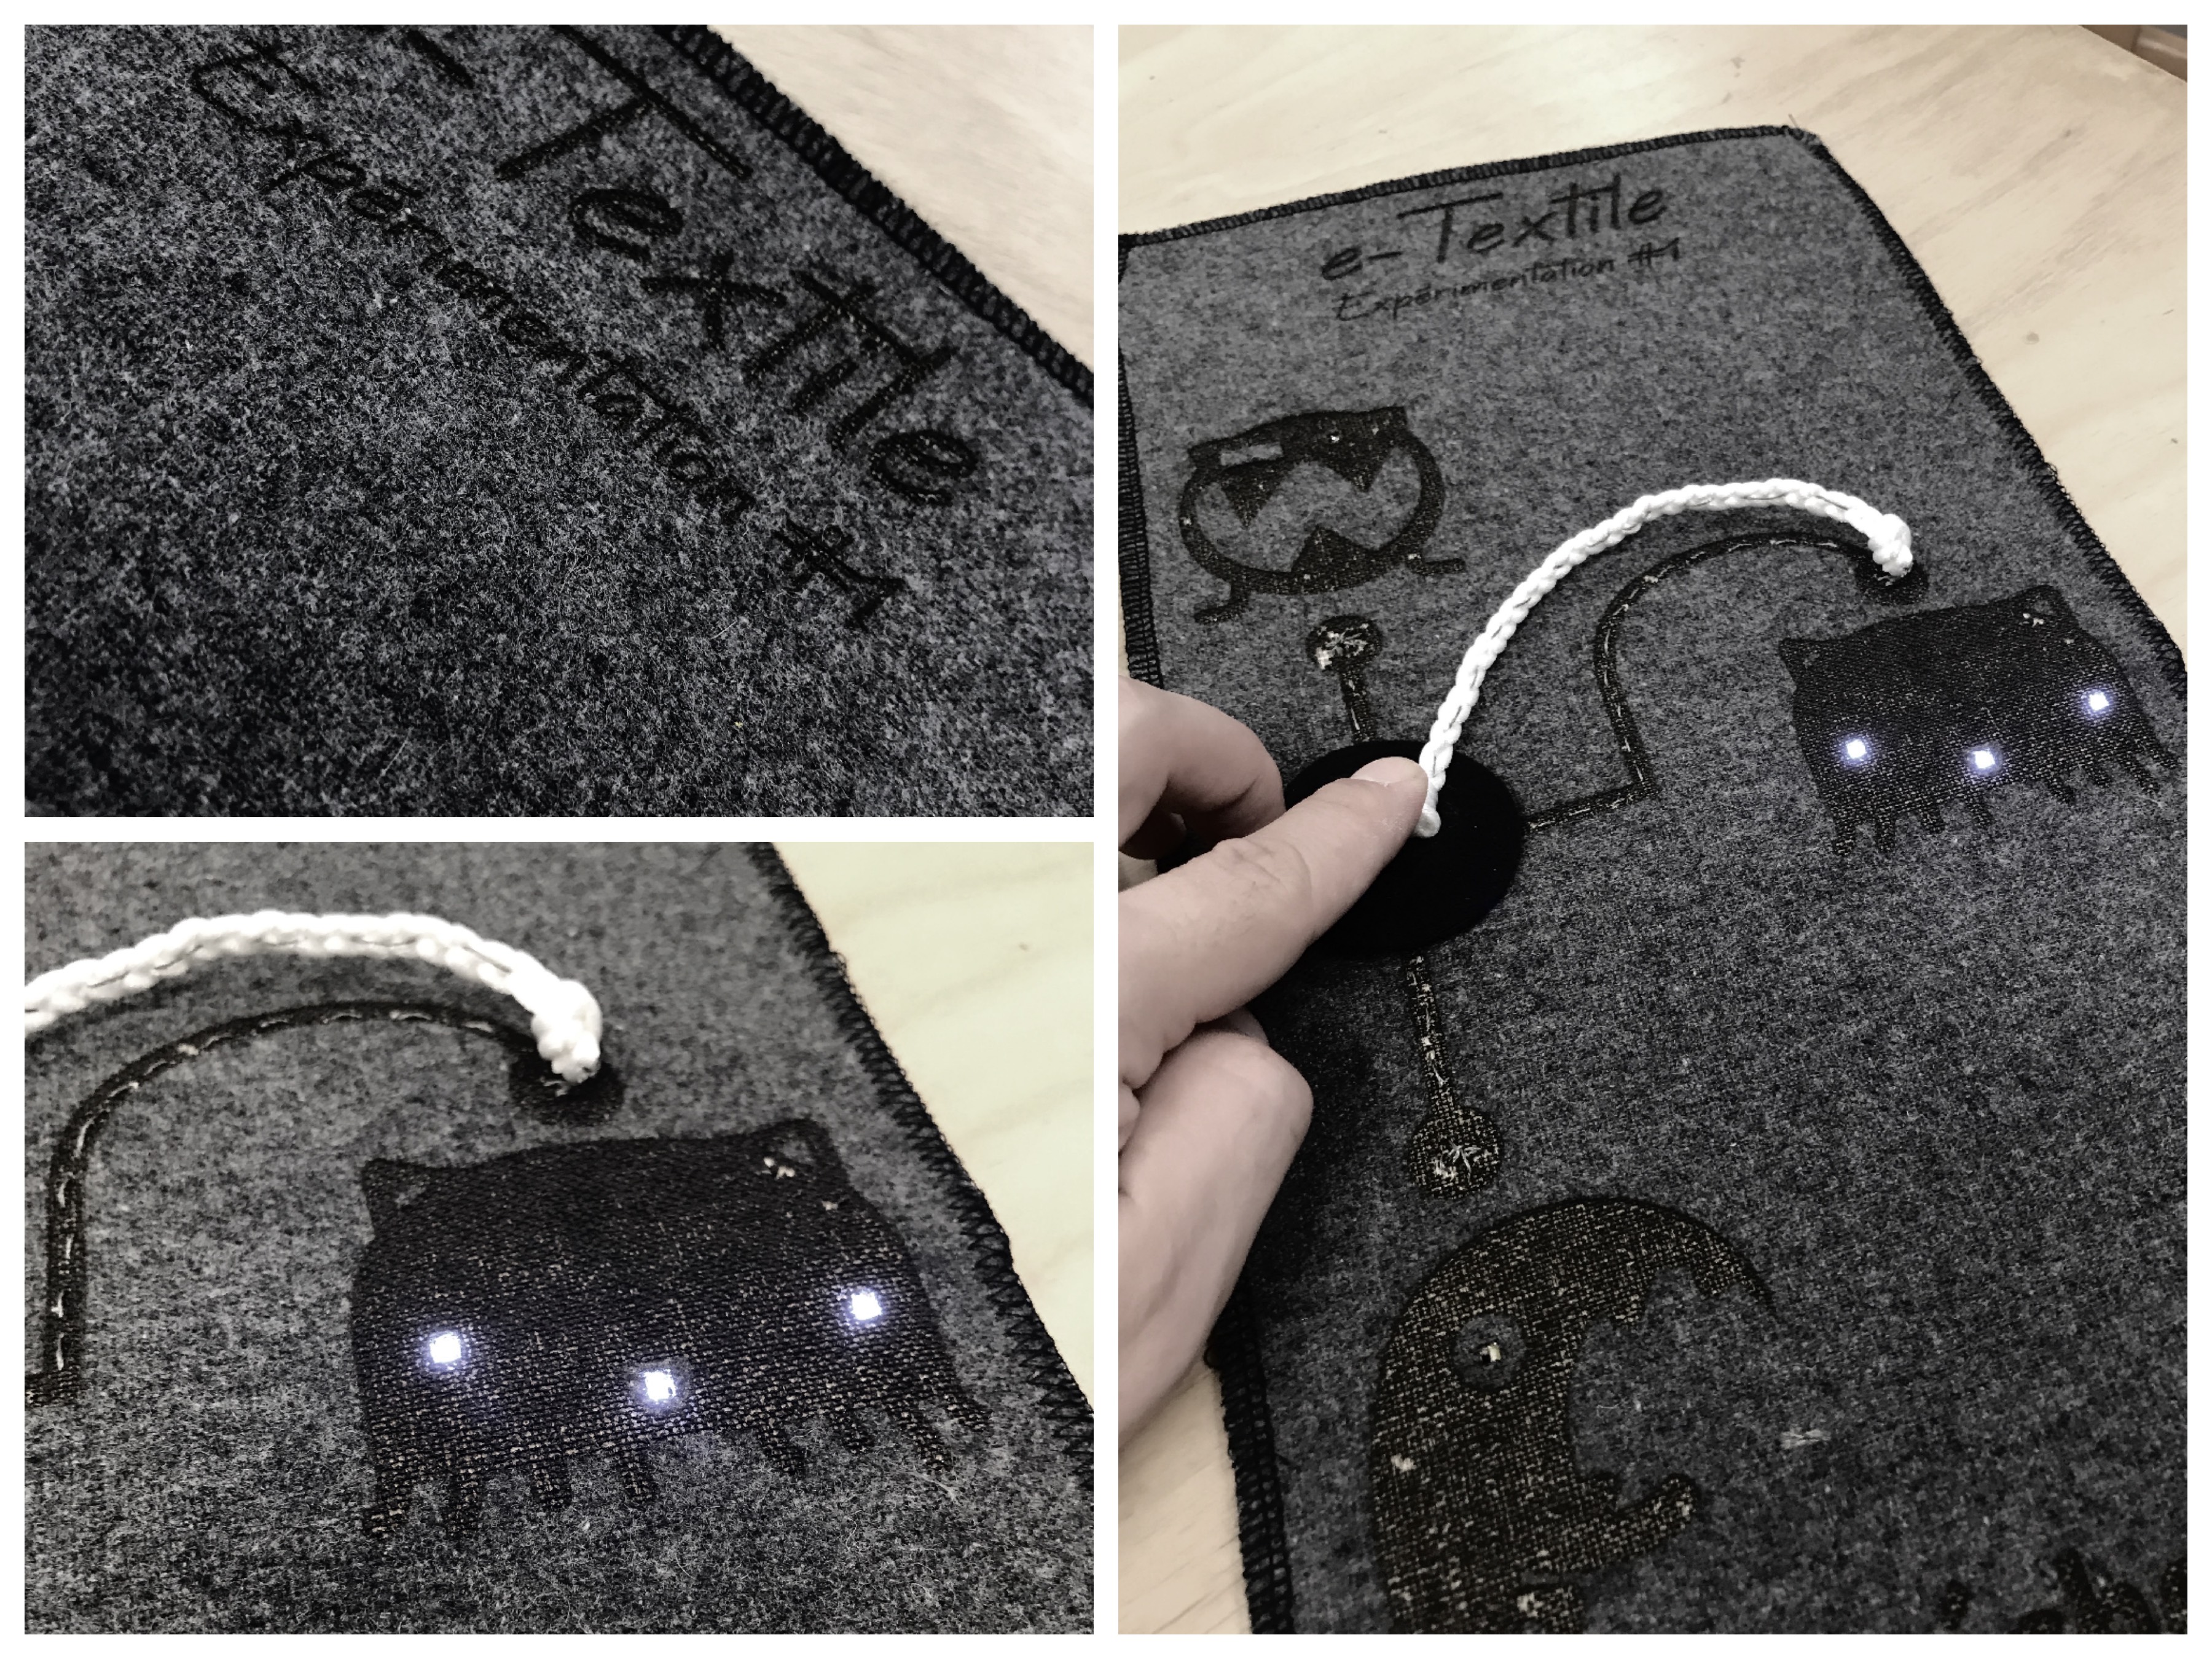
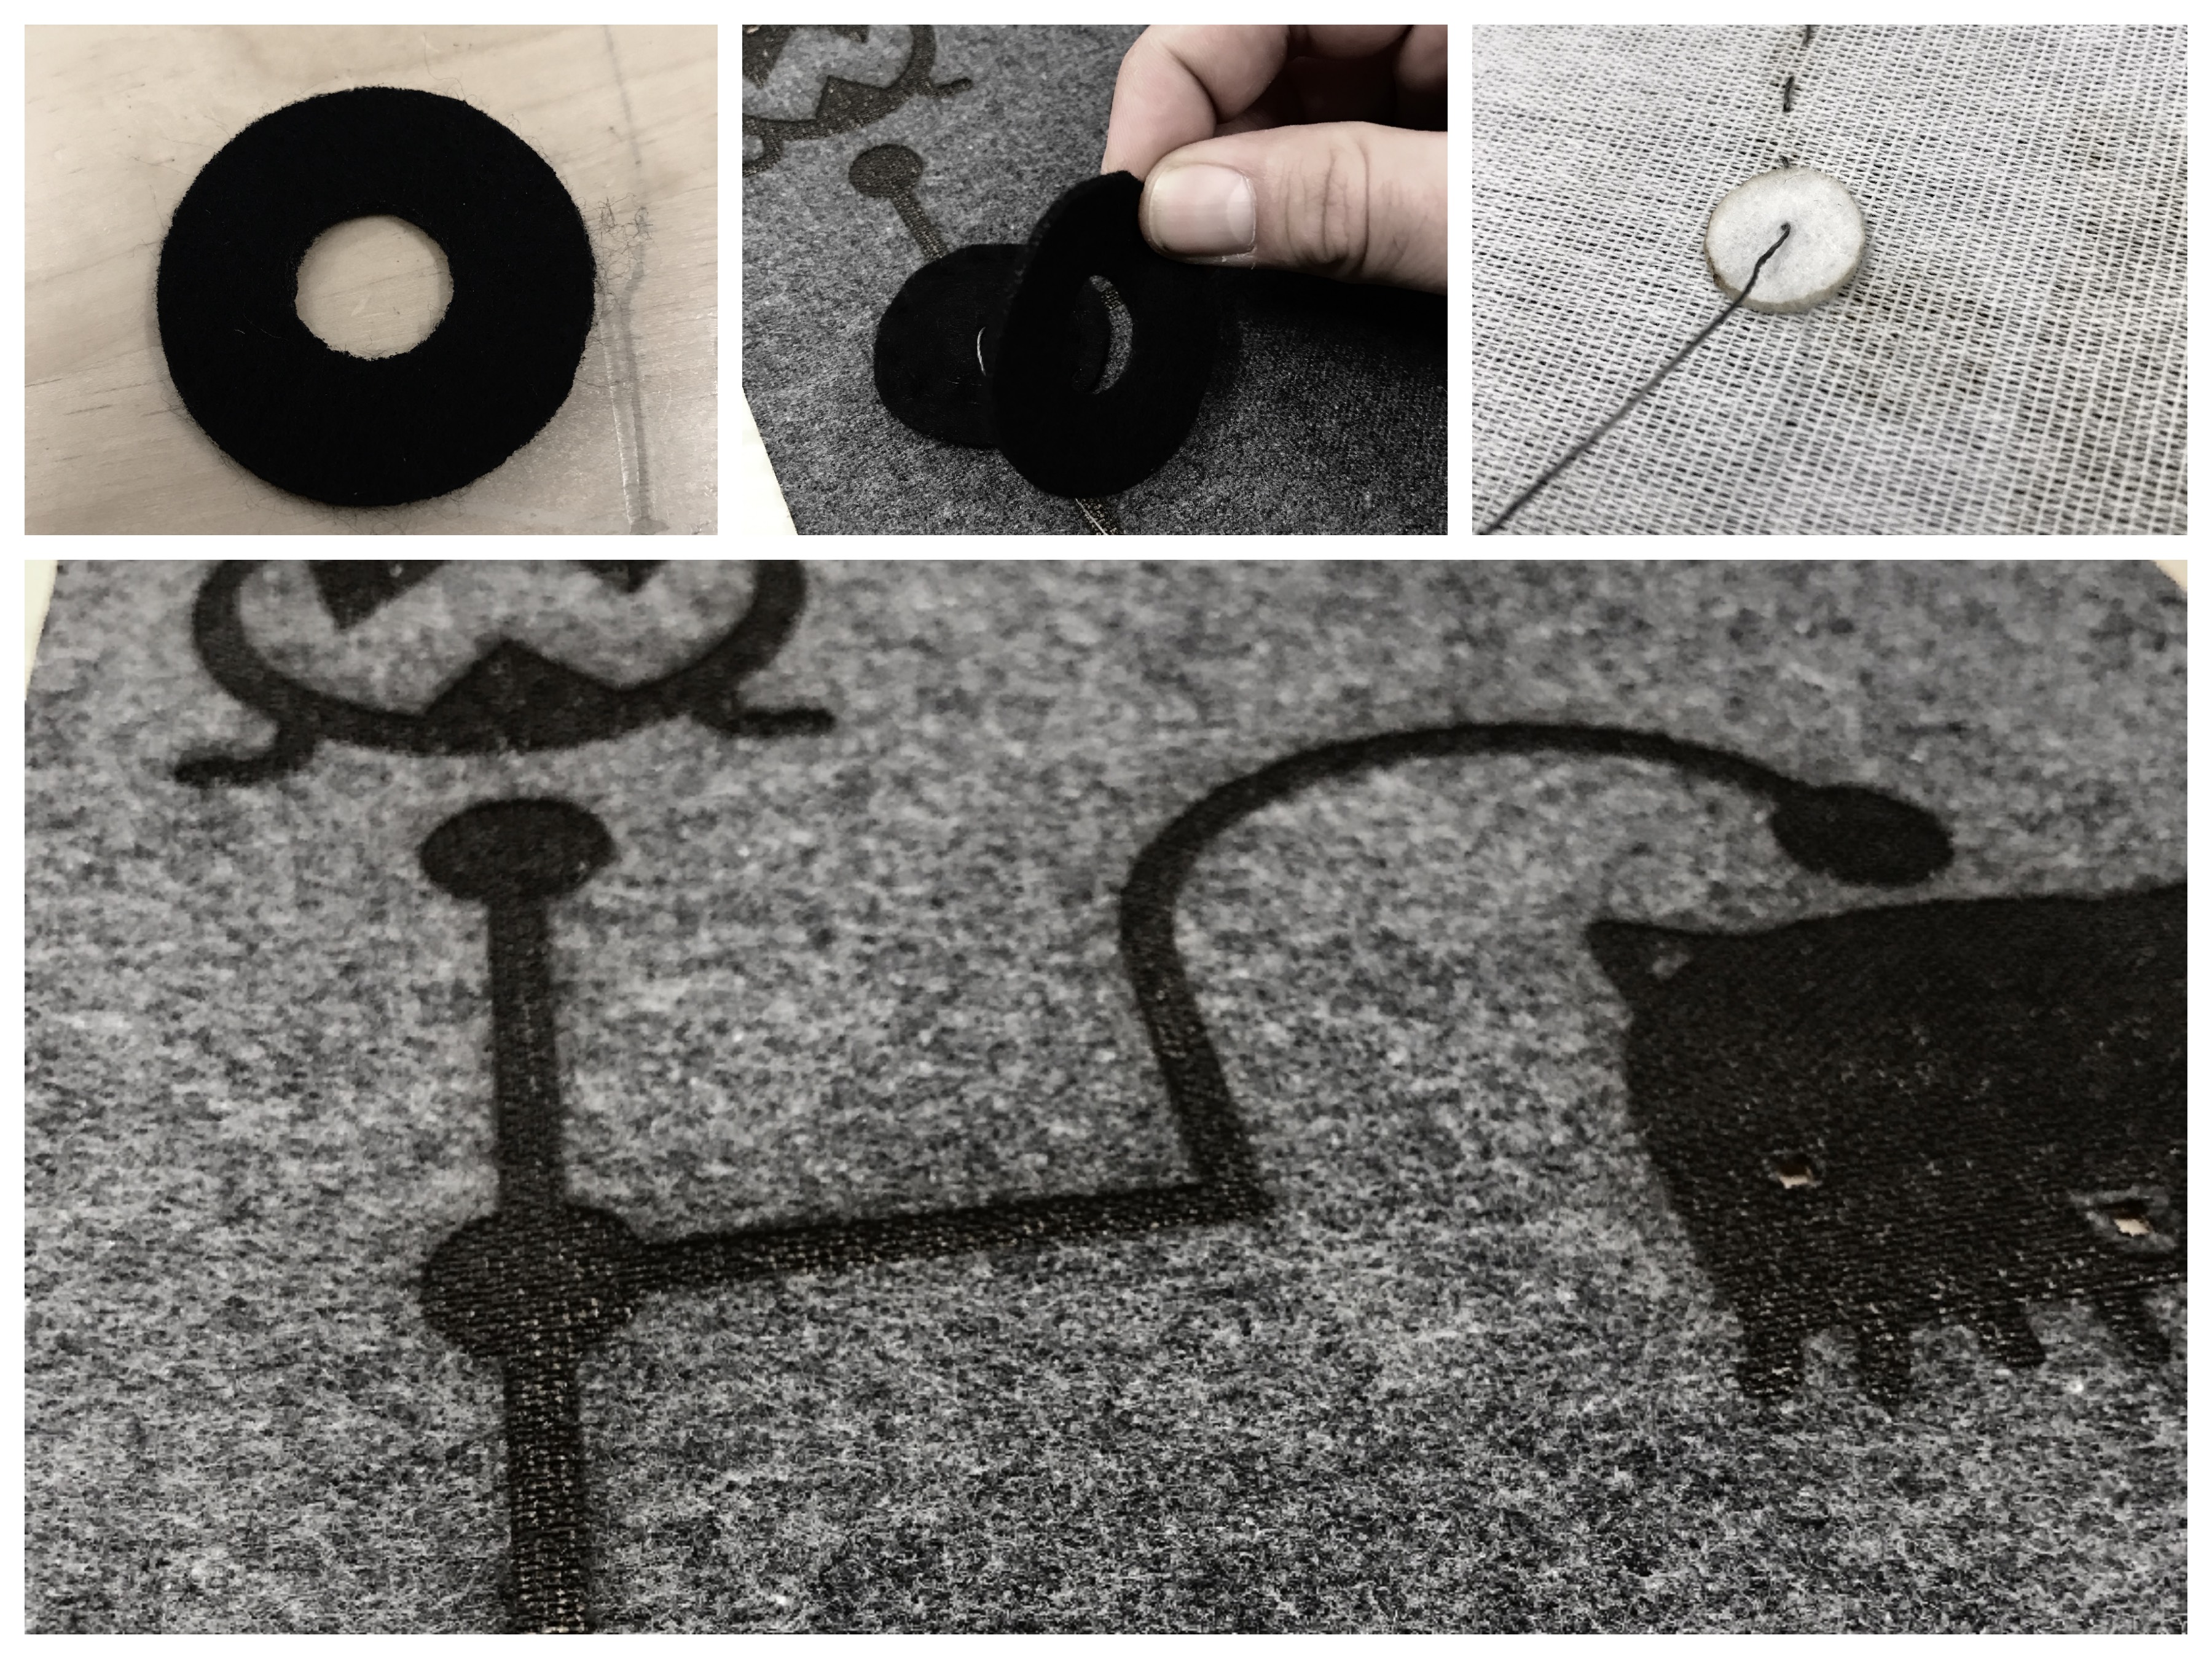
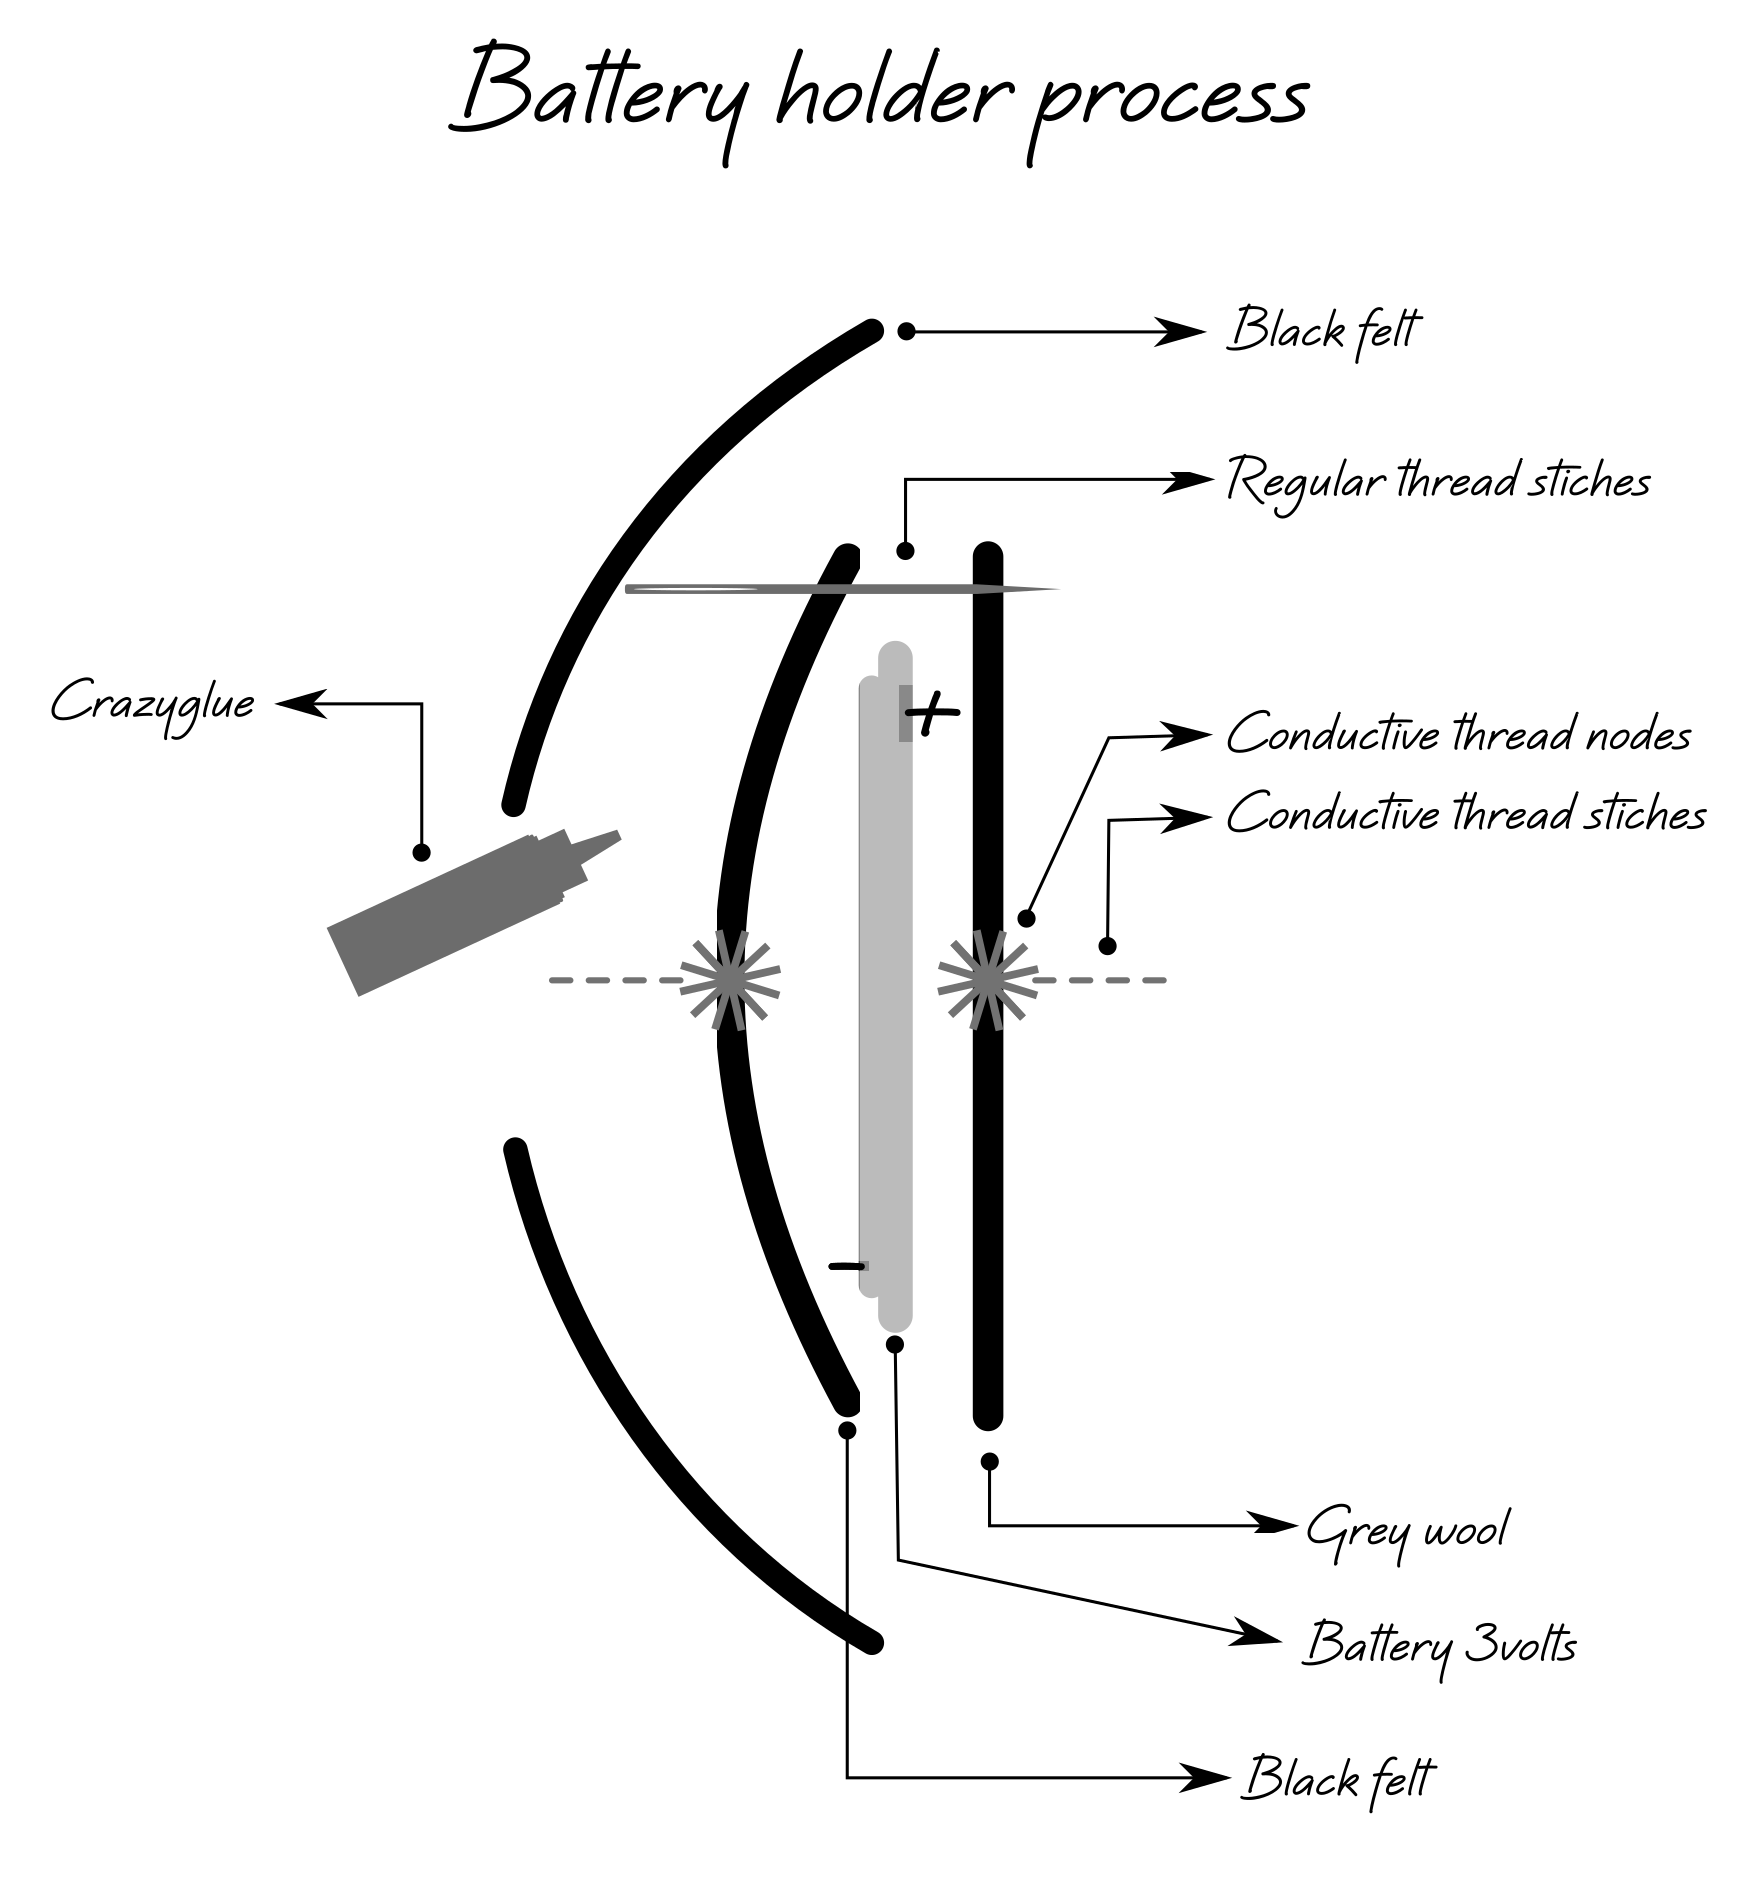
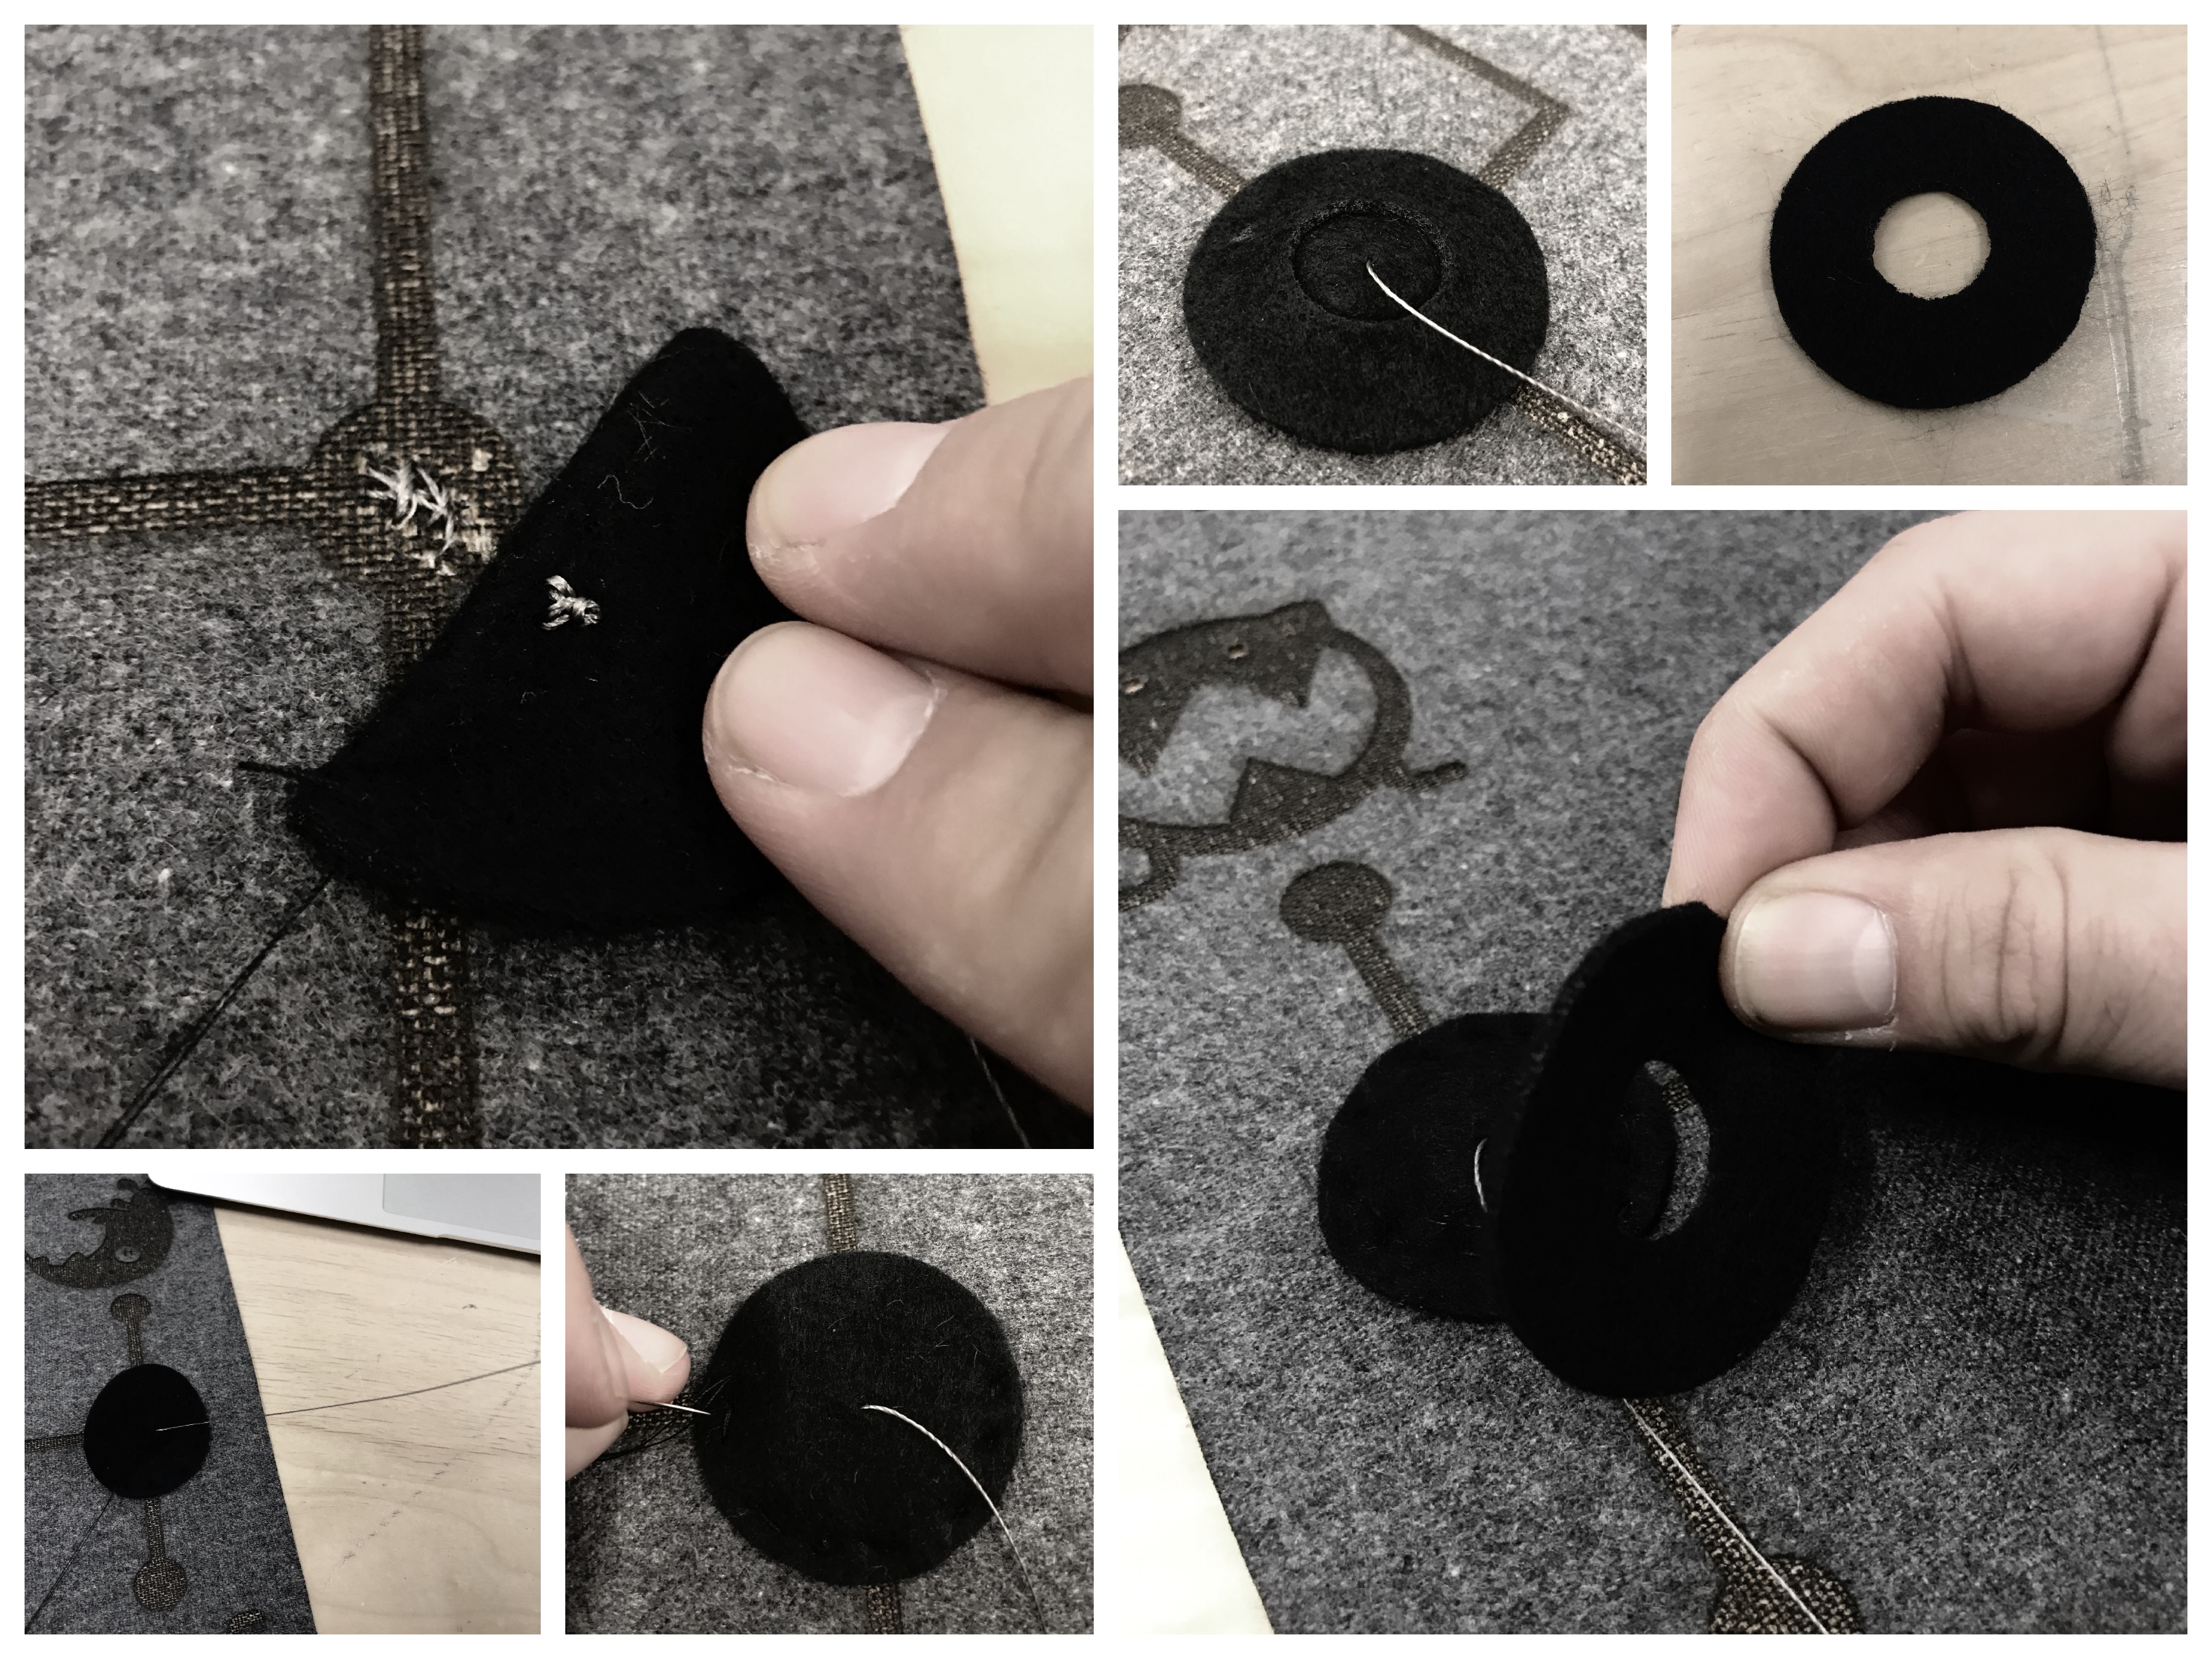
2. Placing the battery and making the connectors
After having a cut all the pieces, the first step was to make de nodes that'll connect the negative and positive side of the battery. I'll work with those as connectors all along of the making of the circuit. Simply, I took the conductive thread and made two big nodes. One on the grey wool canvas and the other on the small black felt circle. After that, I sew the small circle on the main material with the battery thingly put inside. The stitches were not super clean so I decided to put the other circle over it and glued it so the whole thing would be cleaner.
2. Stiching the circuit
Now it's the time to make the other + and - node and the stiches that'll connect everything togheter. The sketch is, I think, already explicit enough so you can understand what has been done.
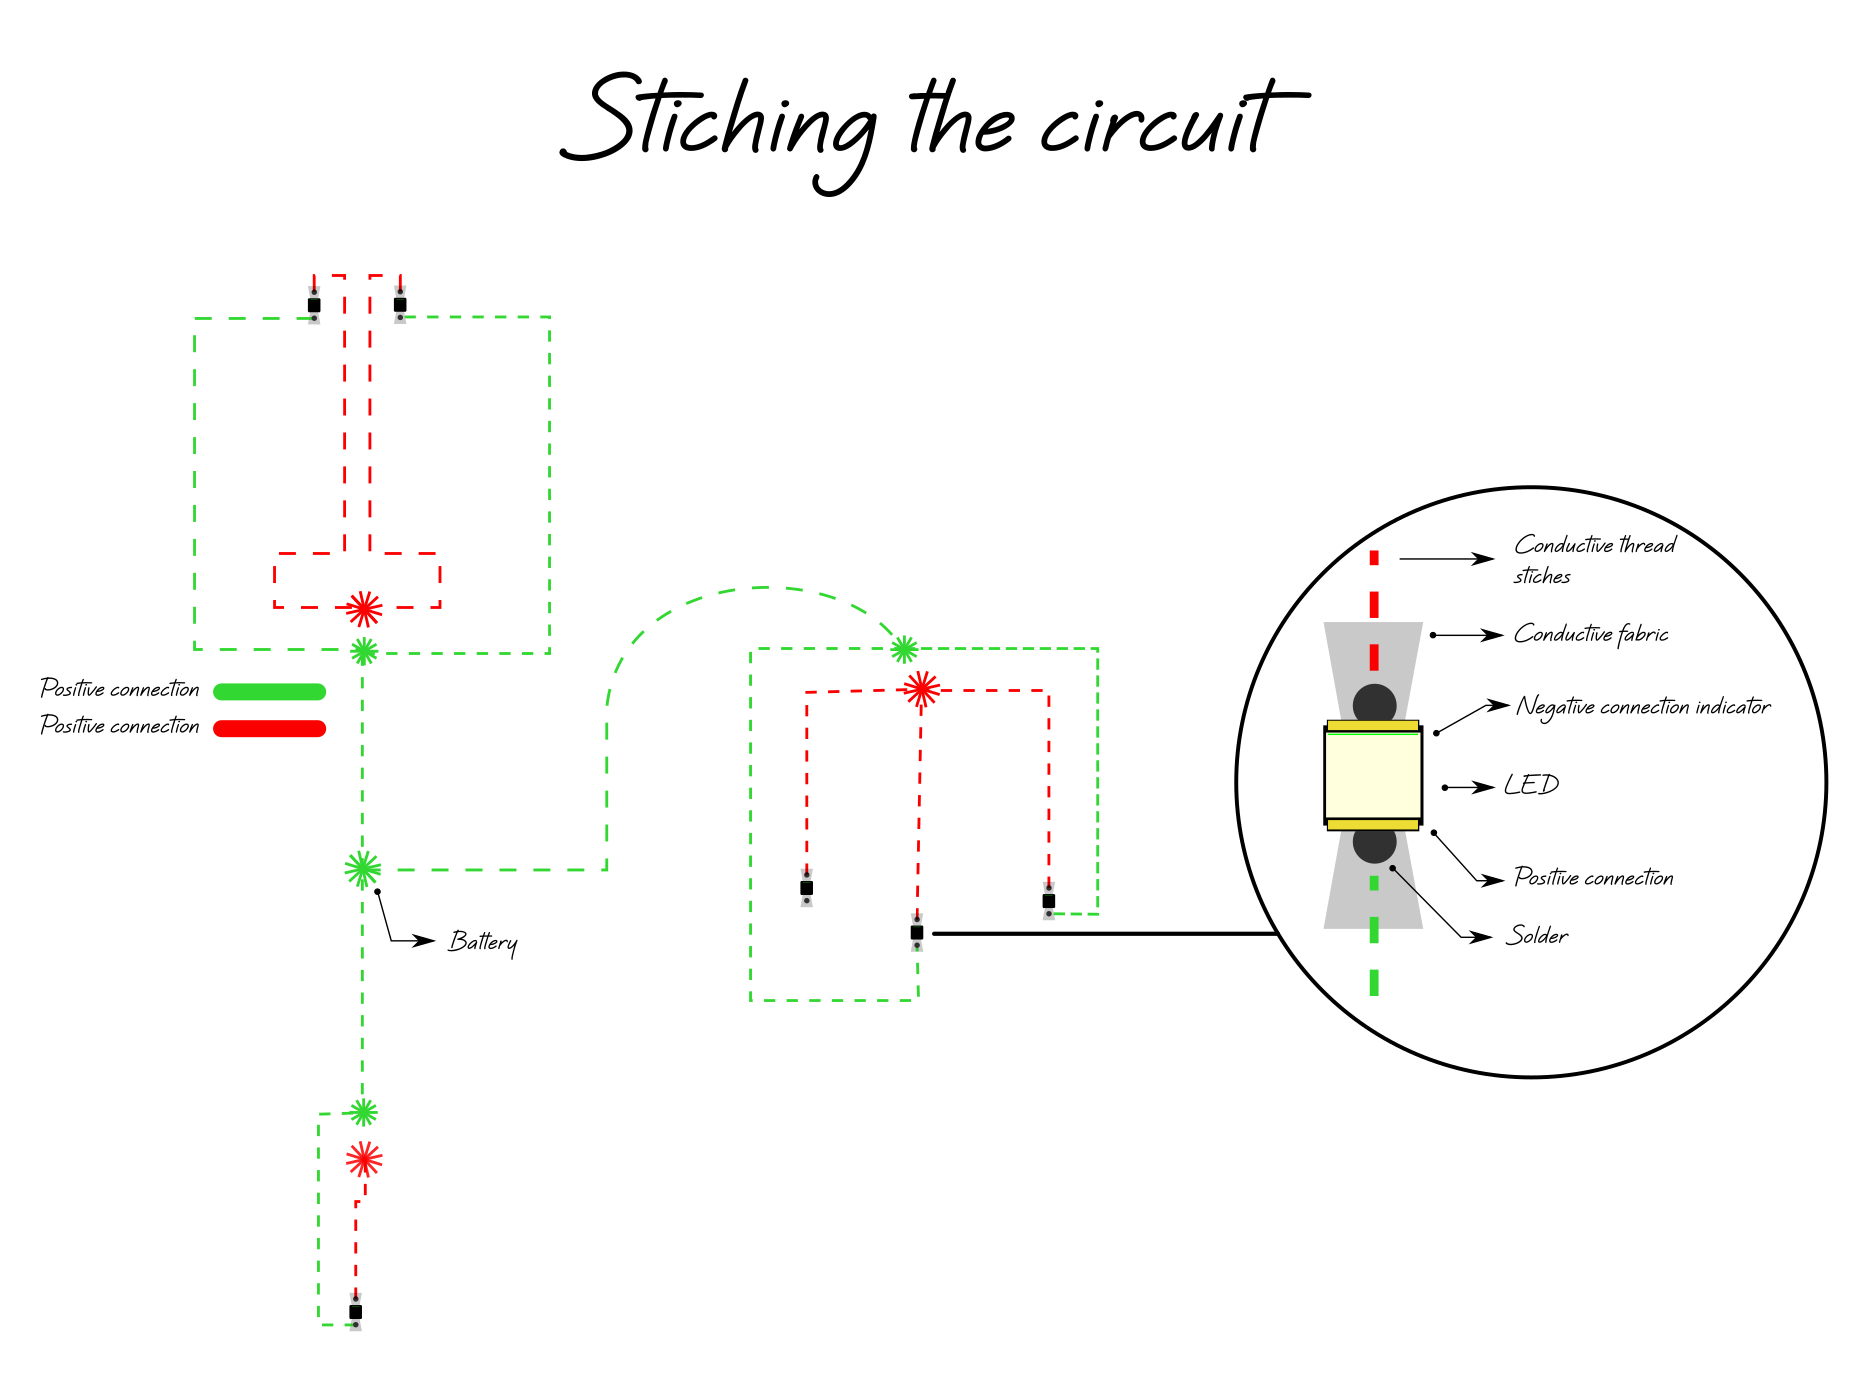
The best order to do those tasks is :
- 1. Make all the nodes
- 2. Sew to stiches of the circuit
- 3. Being carefull to leave extra thread where there's LED connection so you can put them togehter after having prepared them.
3. Preparing the LEDs
I used some strandard surface mount LED for this exercice. So, I needed to find a way to make connections. I used the conductive material that I lasercutted before so I can solder on it.
After done this, I put them in the right place using the threads that I left to sew them toghether. It is very important that in any step of this phase to validate that everything works well.
Closing the circuit
It's the negative part of the circuit that will be used to change activities between the characters. So, it has to be mobile to do so. This is why I braided the decorative white rope and then pass a conductive thread through it. Then, I made a little node as a contact point.
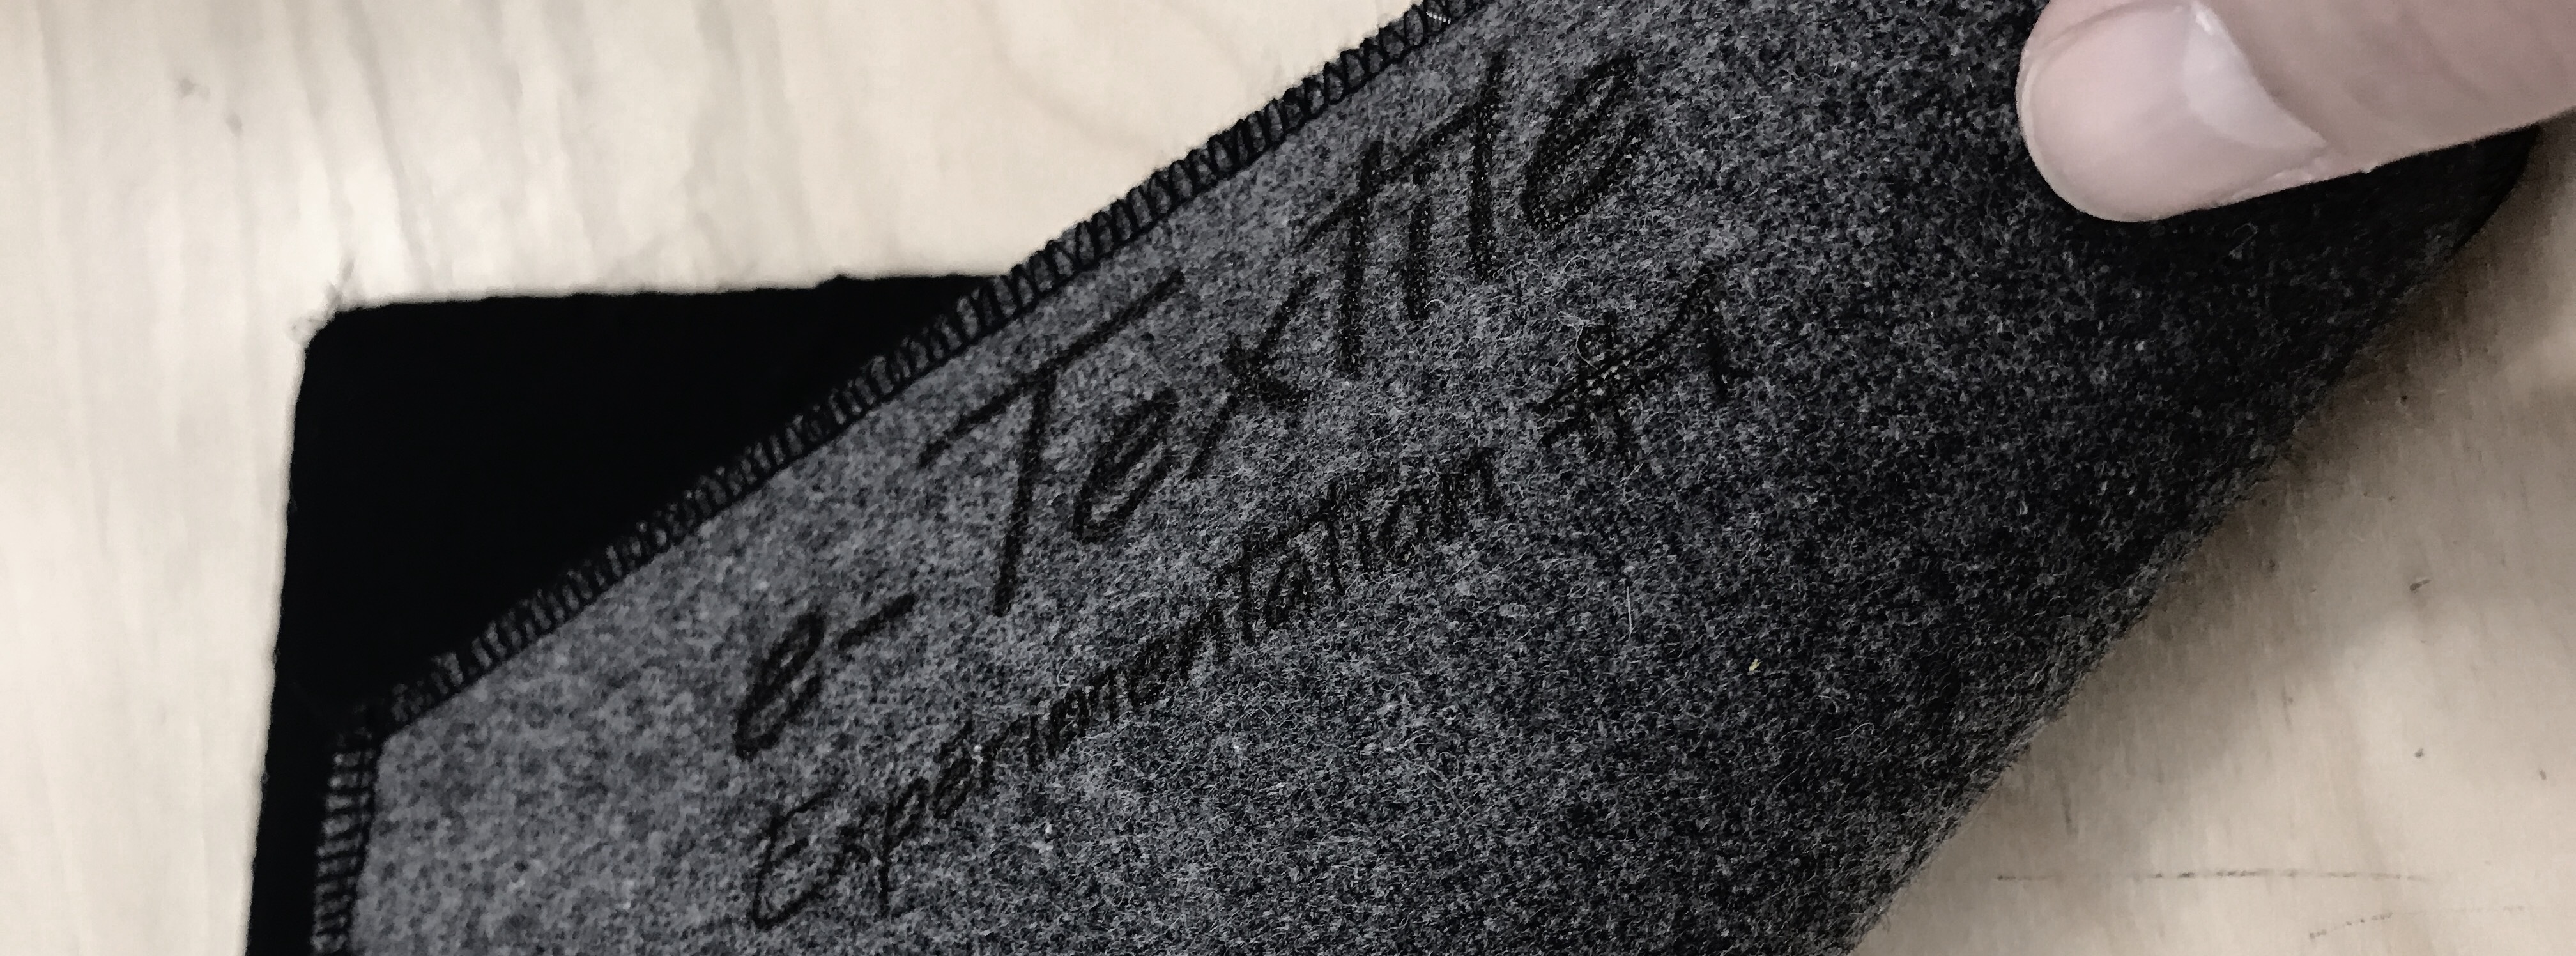
Make the finishing
Well, I'm obsessed with finishing! Even in rapid prototyping because thinking and experimenting finishes can change the whole thing and at it's what's going to make de design clean and well presented VS a sad and sloppy project. Yes, I come from that school!
It doesn't need to be a complex or luxurioux one. In this case I used a black felt as a lining with an overlock stich to finish it all around.
Final results
Over all, I'm very glad that I came up with a completely functional piece without problem, well I did a pretty simple project too you'd say but the way I built it, I'll be able to animate introduction to circuits activities with young people. I made two hits with one rock and that's awsome! But this week oppened a whole new world to me an I already have plenty more ideas for futur projects.