Flexible or soft acrylic #1
For my first experimentation this week, I decided to prepare an assembly of textile and three different kinds of acrylic. The first step of this process was to prepare a pattern design because I guess we all want a nice project, don't we? In this case, I inspired myself with Islamic patterns because I like them a lot of course but also, because I thought that the kind of repetition I saw in them would be perfect to keep the proprieties of the textile underneath effective. By this, I mean mostly the flexibility or softness.
The first photo represents a kind of inspiration board and then, the pattern and modules I came with.
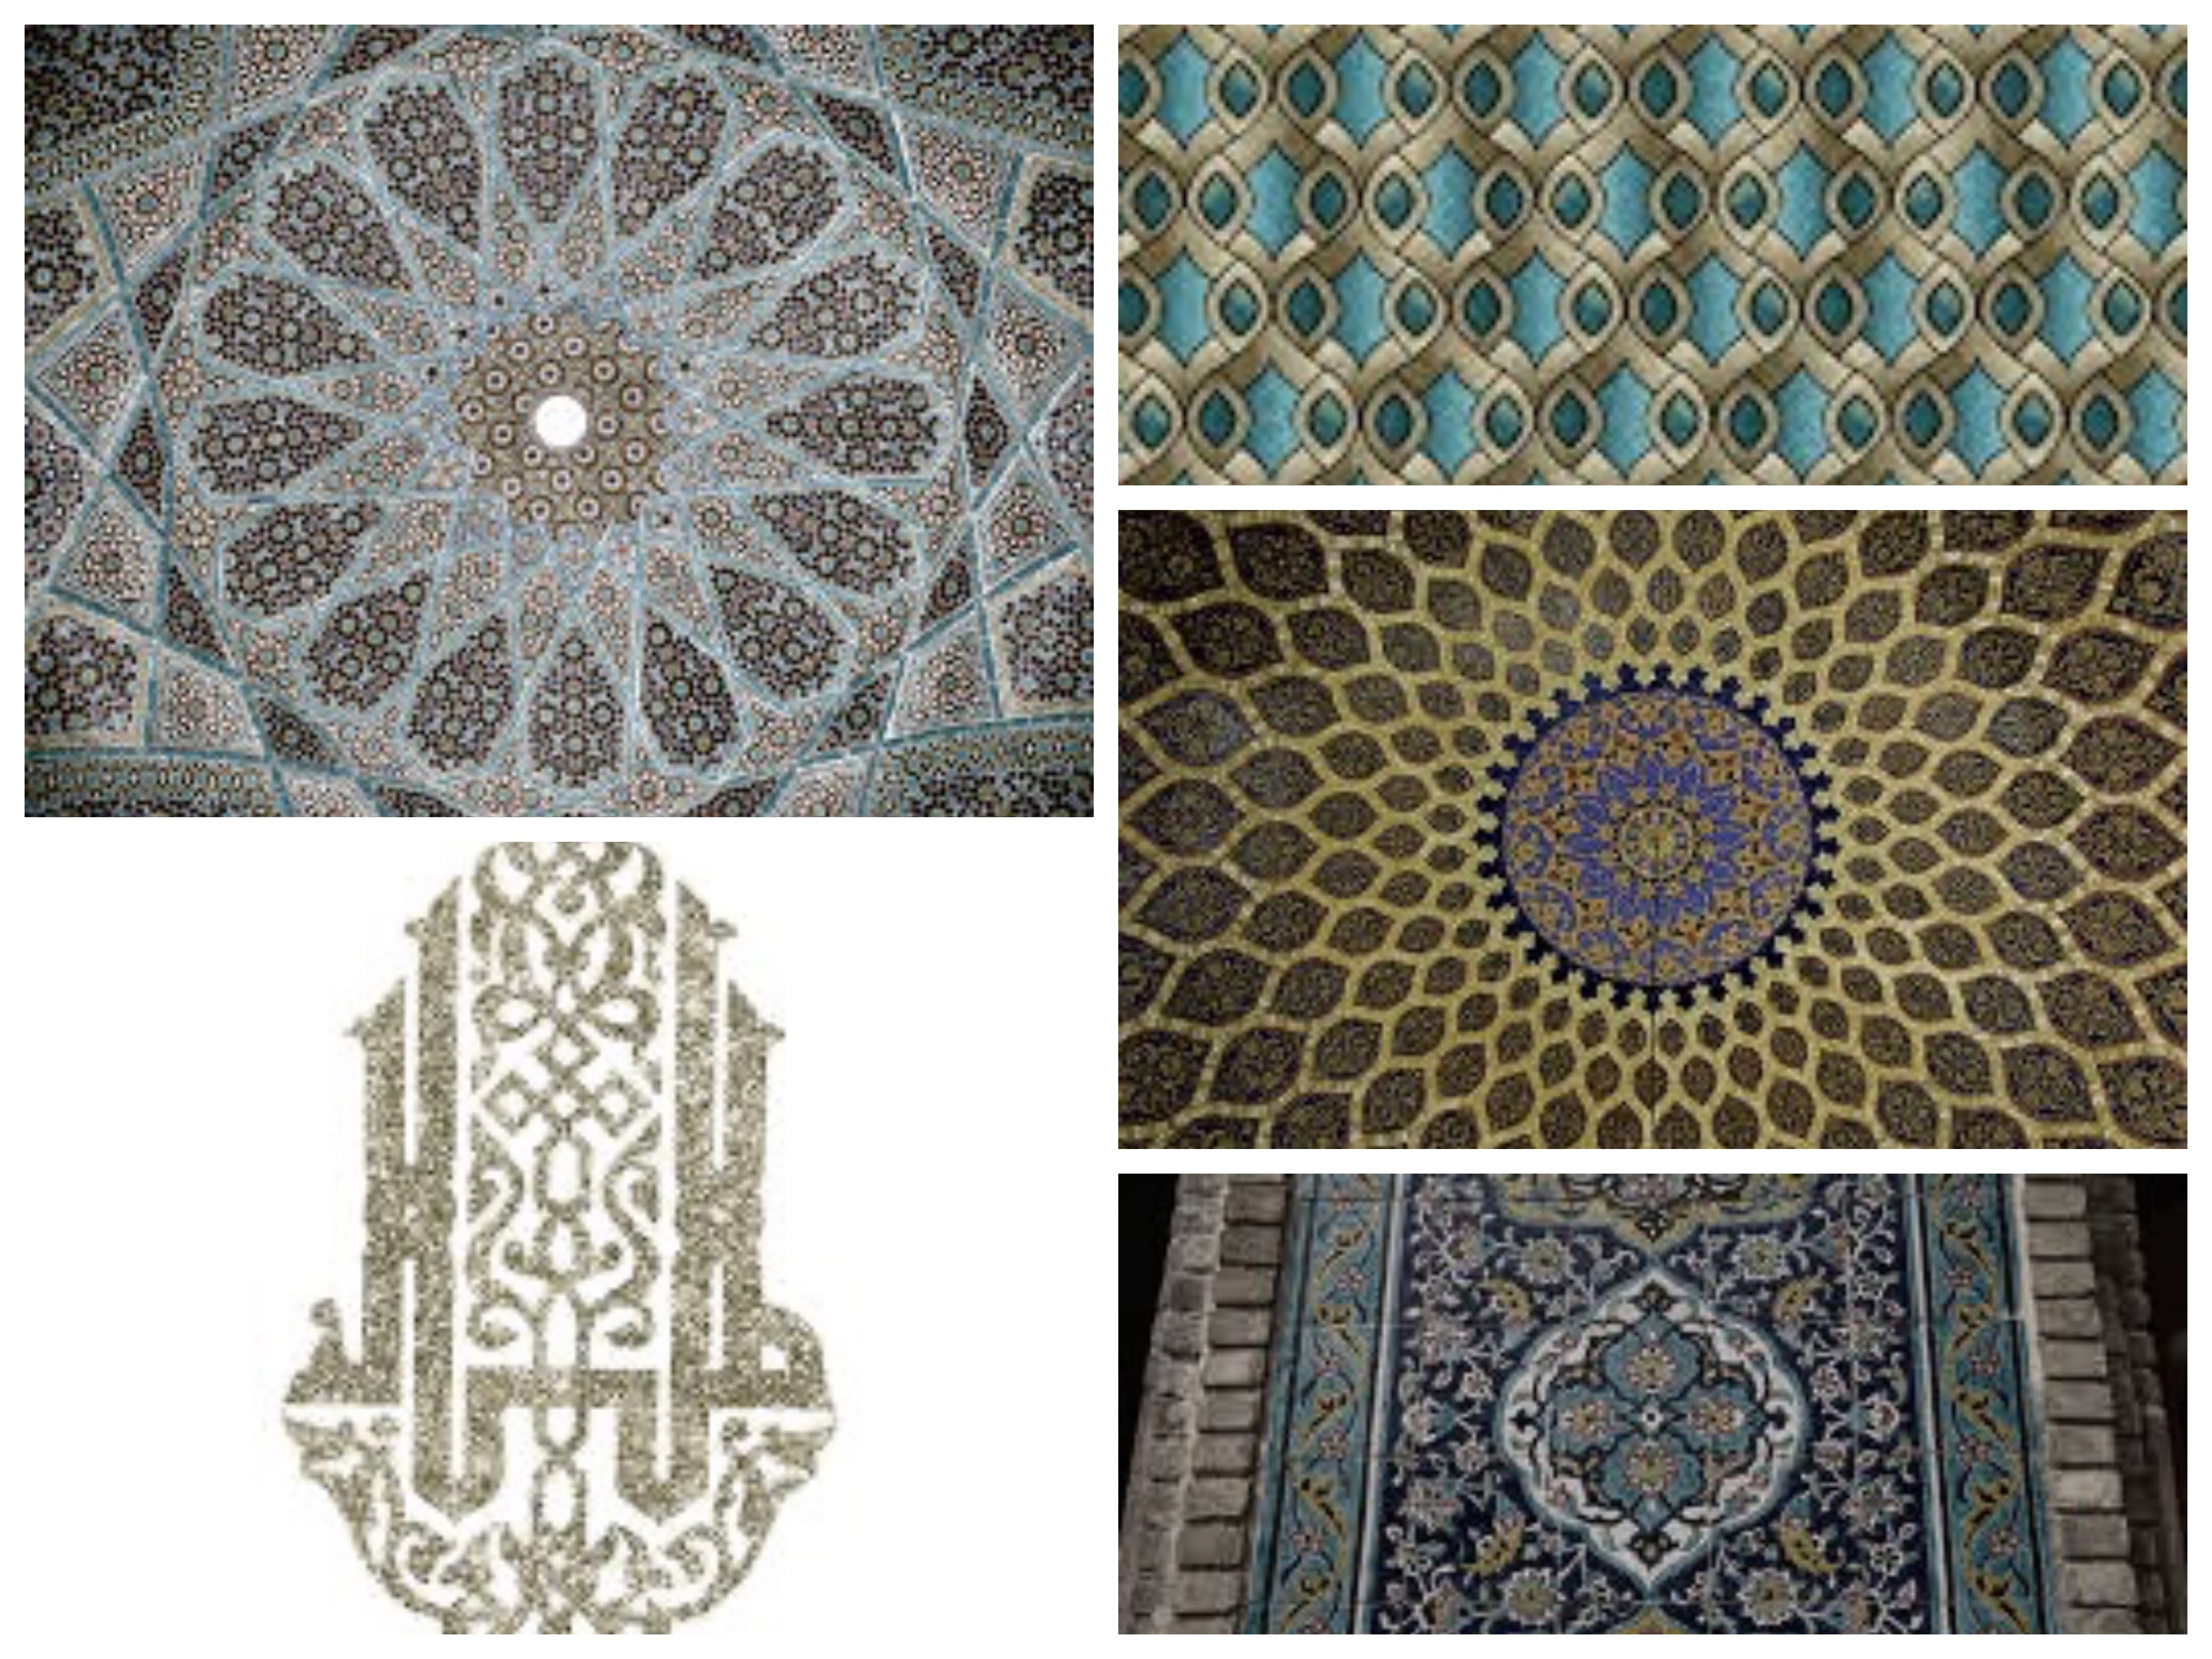
I would like to have a little word about Islamic patterns because they definitly are a big source of inspiration and have been inspire a lot of great artist during the history and yet in the contemporary era. Wikipedia as yet again one great definition of it : "Islamic decoration, which tends to avoid using figurative images, makes frequent use of geometric patterns which have developed over the centuries. The geometric designs in Islamic art are often built on combinations of repeated squares and circles, which may be overlapped and interlaced, as can arabesques (with which they are often combined), to form intricate and complex patterns, including a wide variety of tessellations. These may constitute the entire decoration, may form a framework for floral or calligraphic embellishments, or may retreat into the background around other motifs. The complexity and variety of patterns used evolved from simple stars and lozenges in the ninth century, through a variety of 6- to 13-point patterns by the 13th century, and finally to include also 14- and 16-point stars in the sixteenth century. Geometric patterns occur in a variety of forms in Islamic art and architecture including kilim carpets, Persian girih and Moroccan zellige tilework, muqarnas decorative vaulting, jali pierced stone screens, ceramics, leather, stained glass, woodwork, and metalwork. Interest in Islamic geometric patterns is increasing in the West, both among craftsmen and artists including M. C. Escher in the twentieth century, and among mathematicians and physicists including Peter J. Lu and Paul Steinhardt who controversially claimed in 2007 that tilings at the Darb-e Imam shrine in Isfahan could generate quasi-periodic patterns like Penrose tilings."
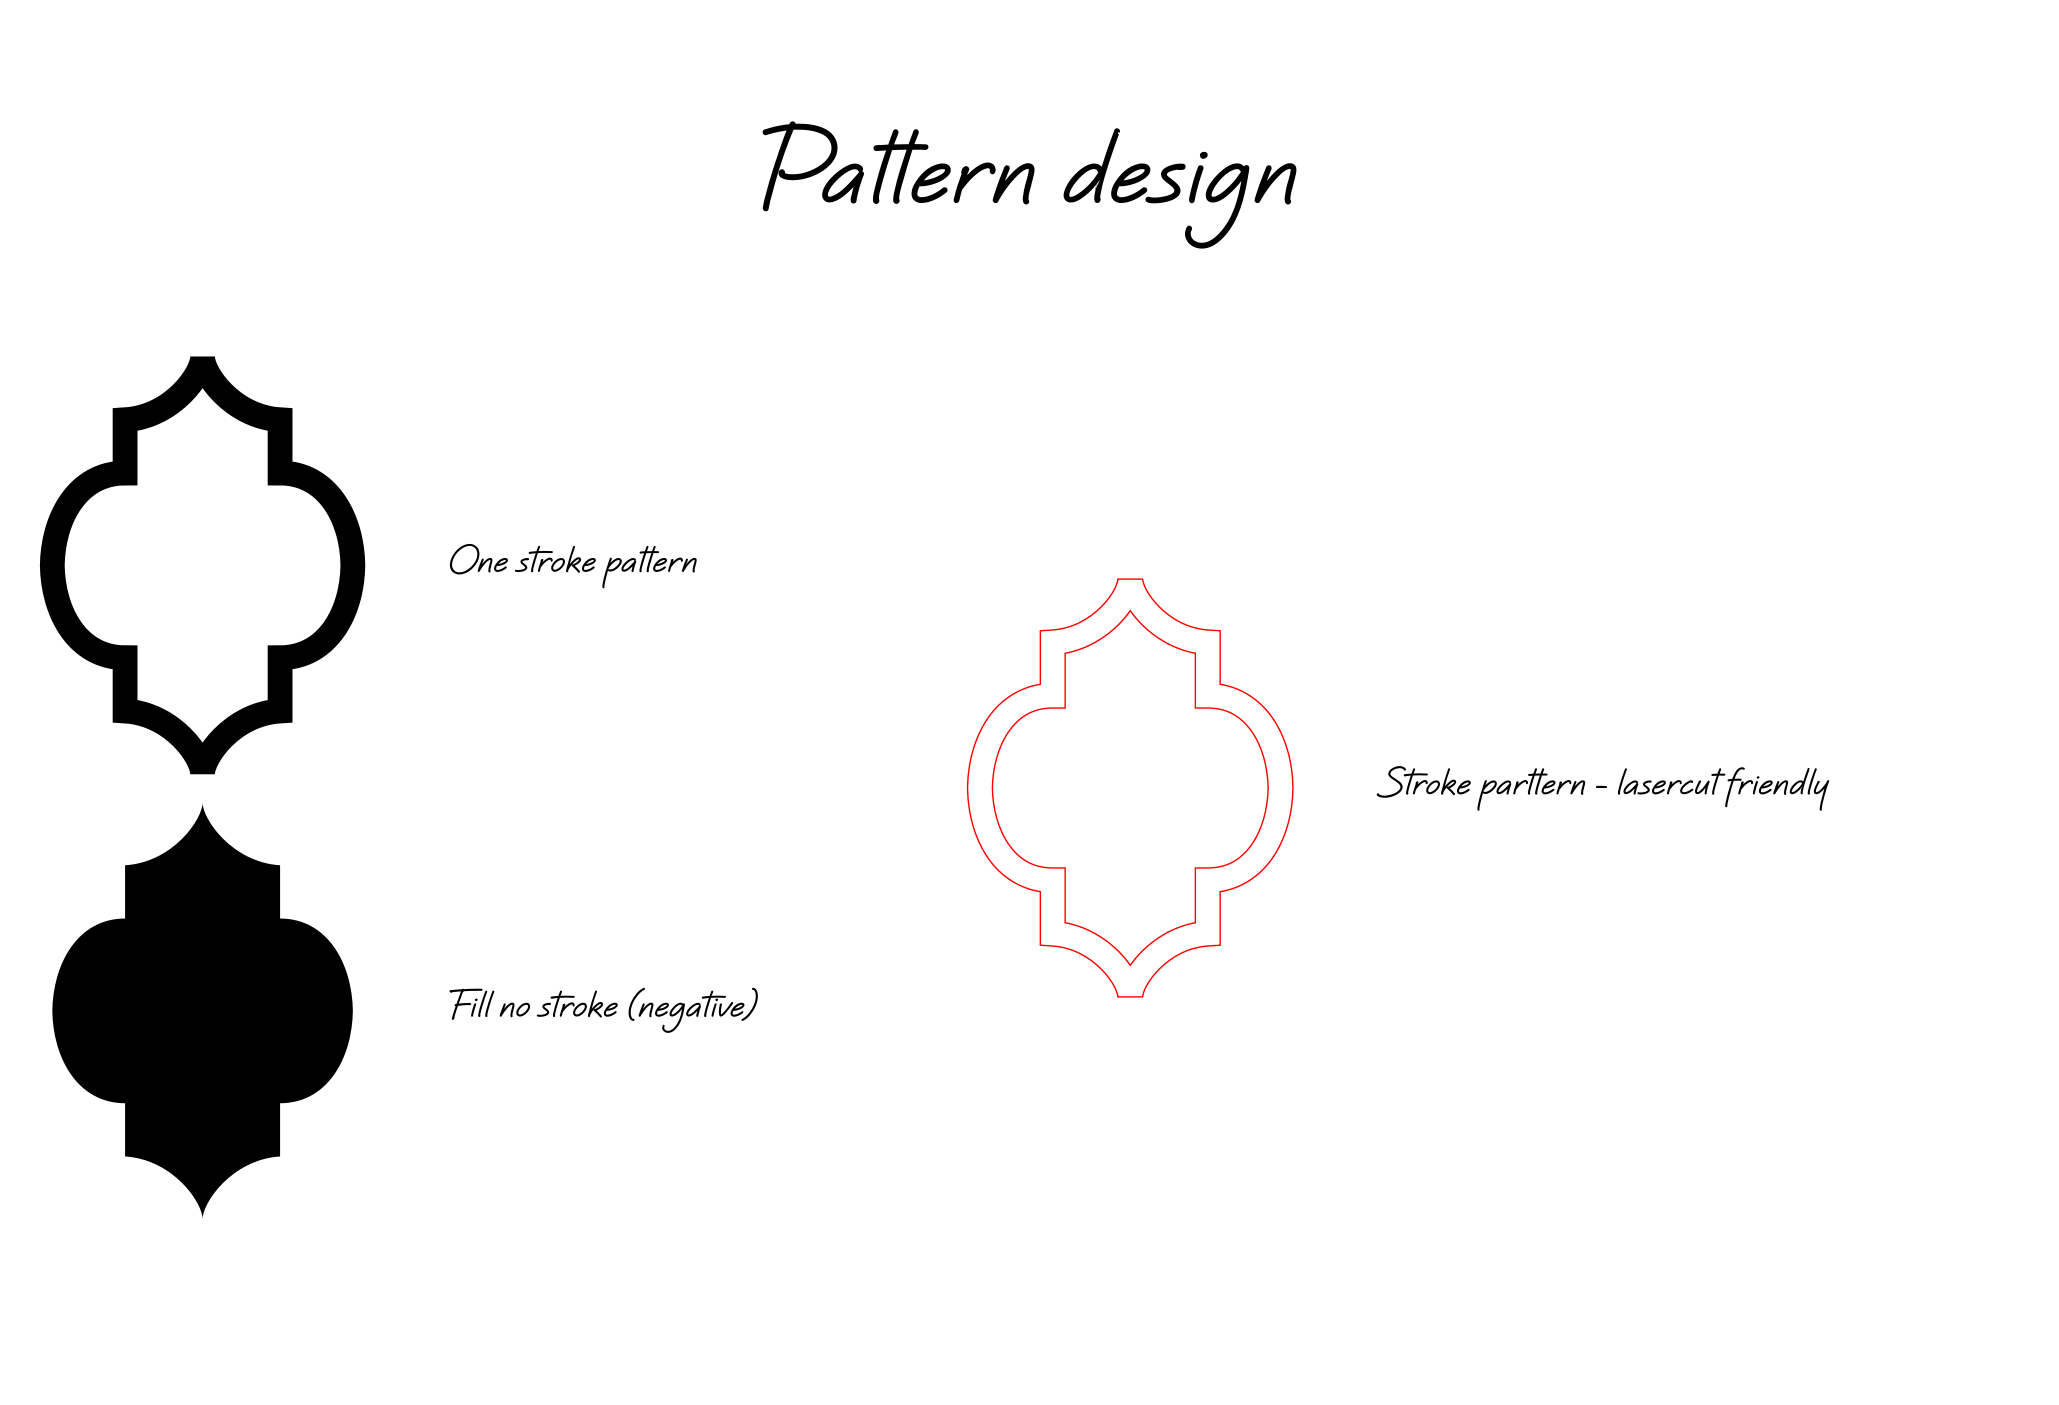
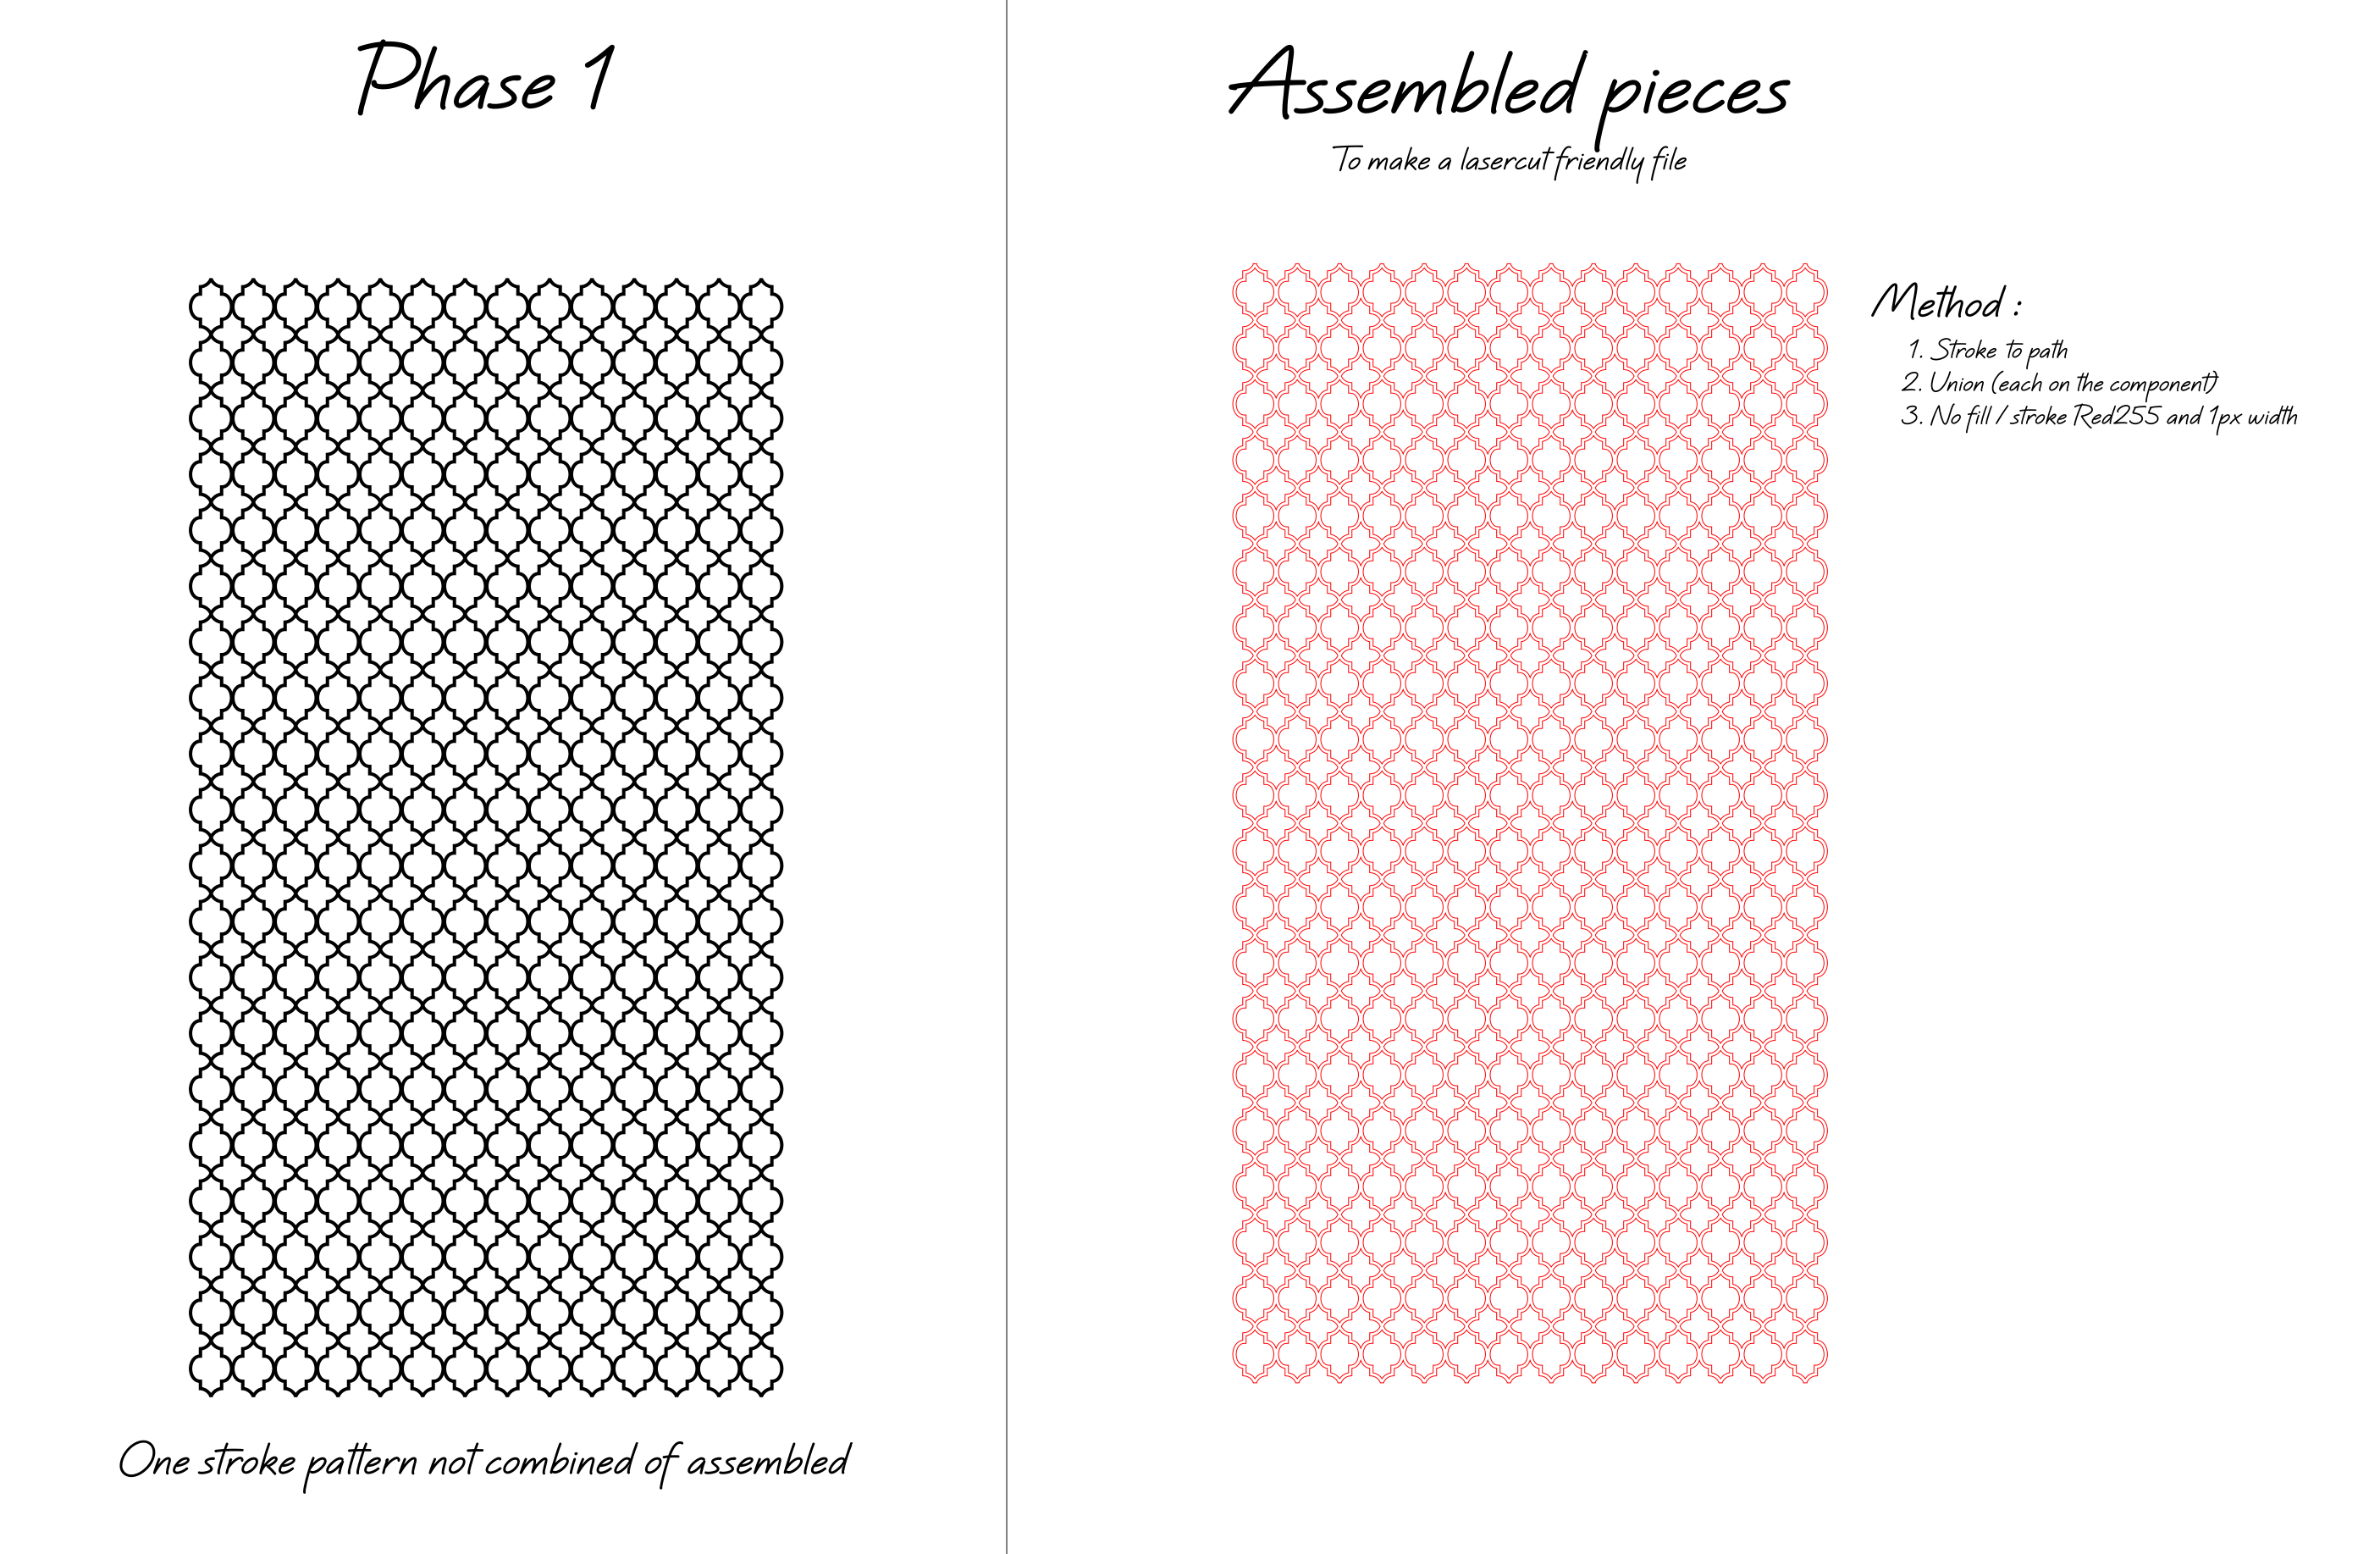
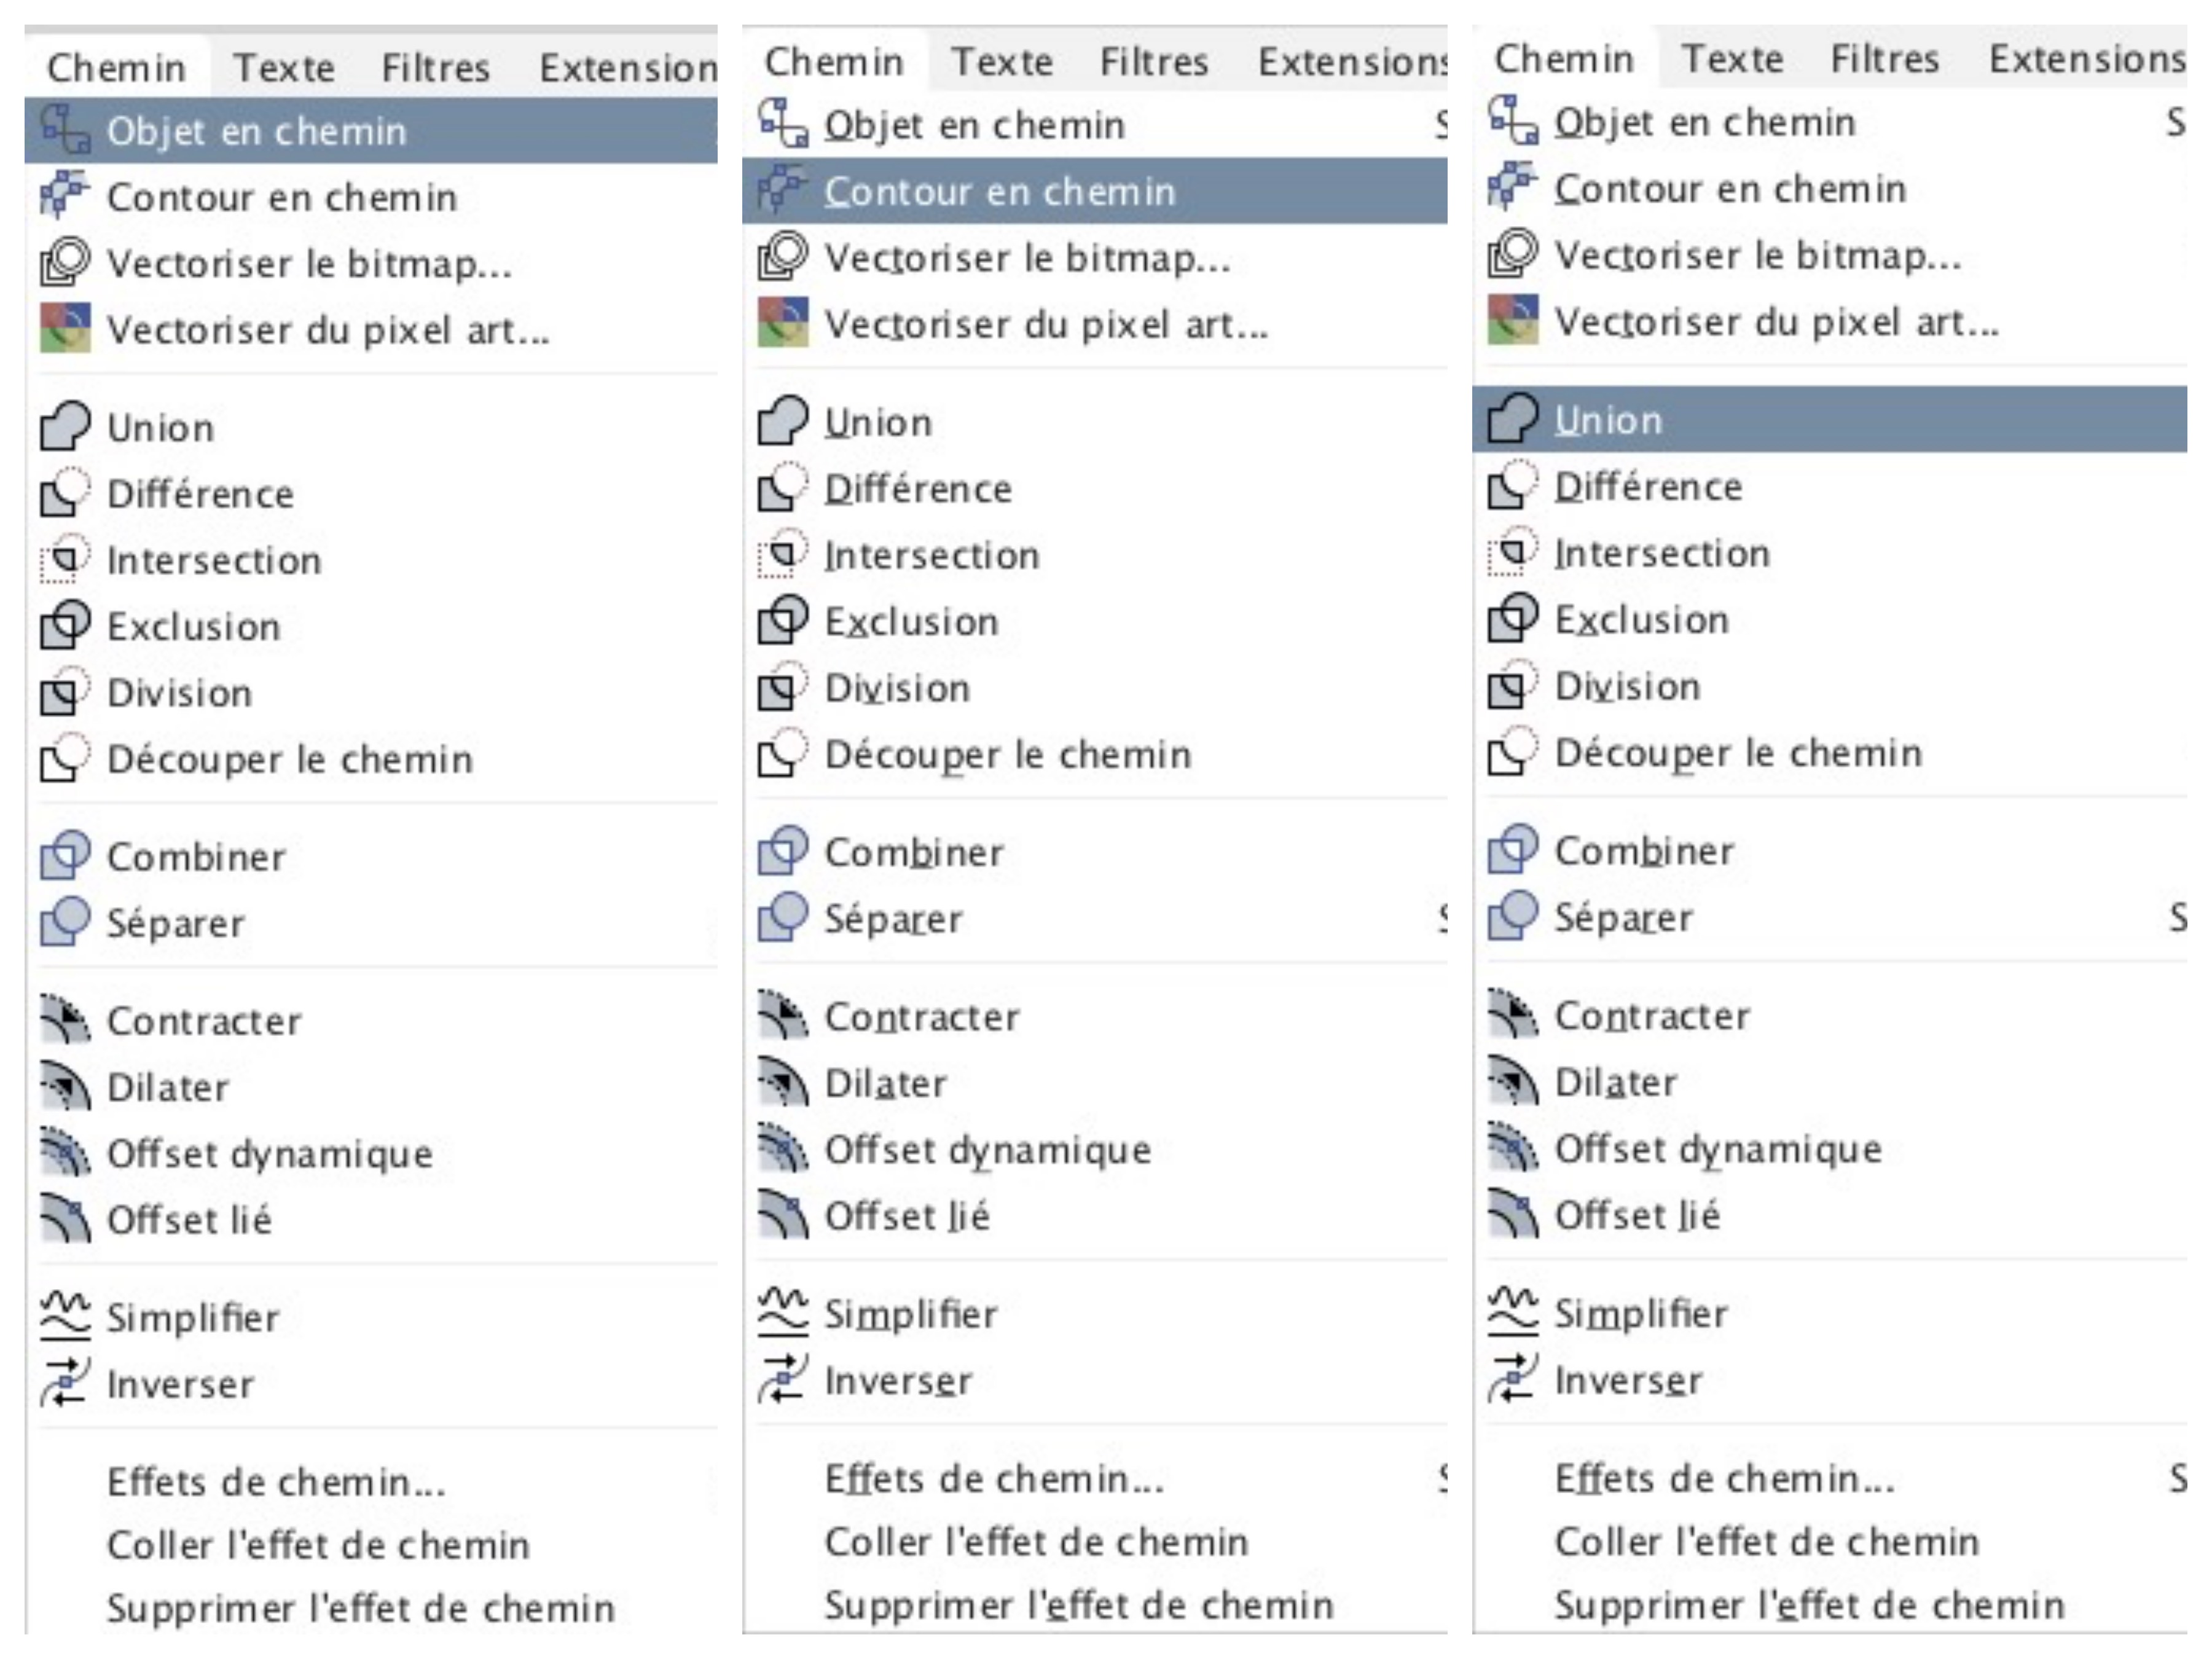
So, here's the pattern I came with. This pattern is very traditional and can be see a little bit everywhere within the Islamic art history. I began by making an assembly on Inkscape with a simple alignment tool and a shape that I moved around. Then, I copied the layer and did an "object to path" and "path to stroke" in the path menu so I can have a module that as double lines (outside and inside). Then, I combined all of them. I observed that it generated a lot less bug with the owner software of our laser cutter. I like to work that way because I find the file much cleaner. The disadvantage of that method is that it is difficult to change the template because everything is connected together. This is why I work on a different layer.
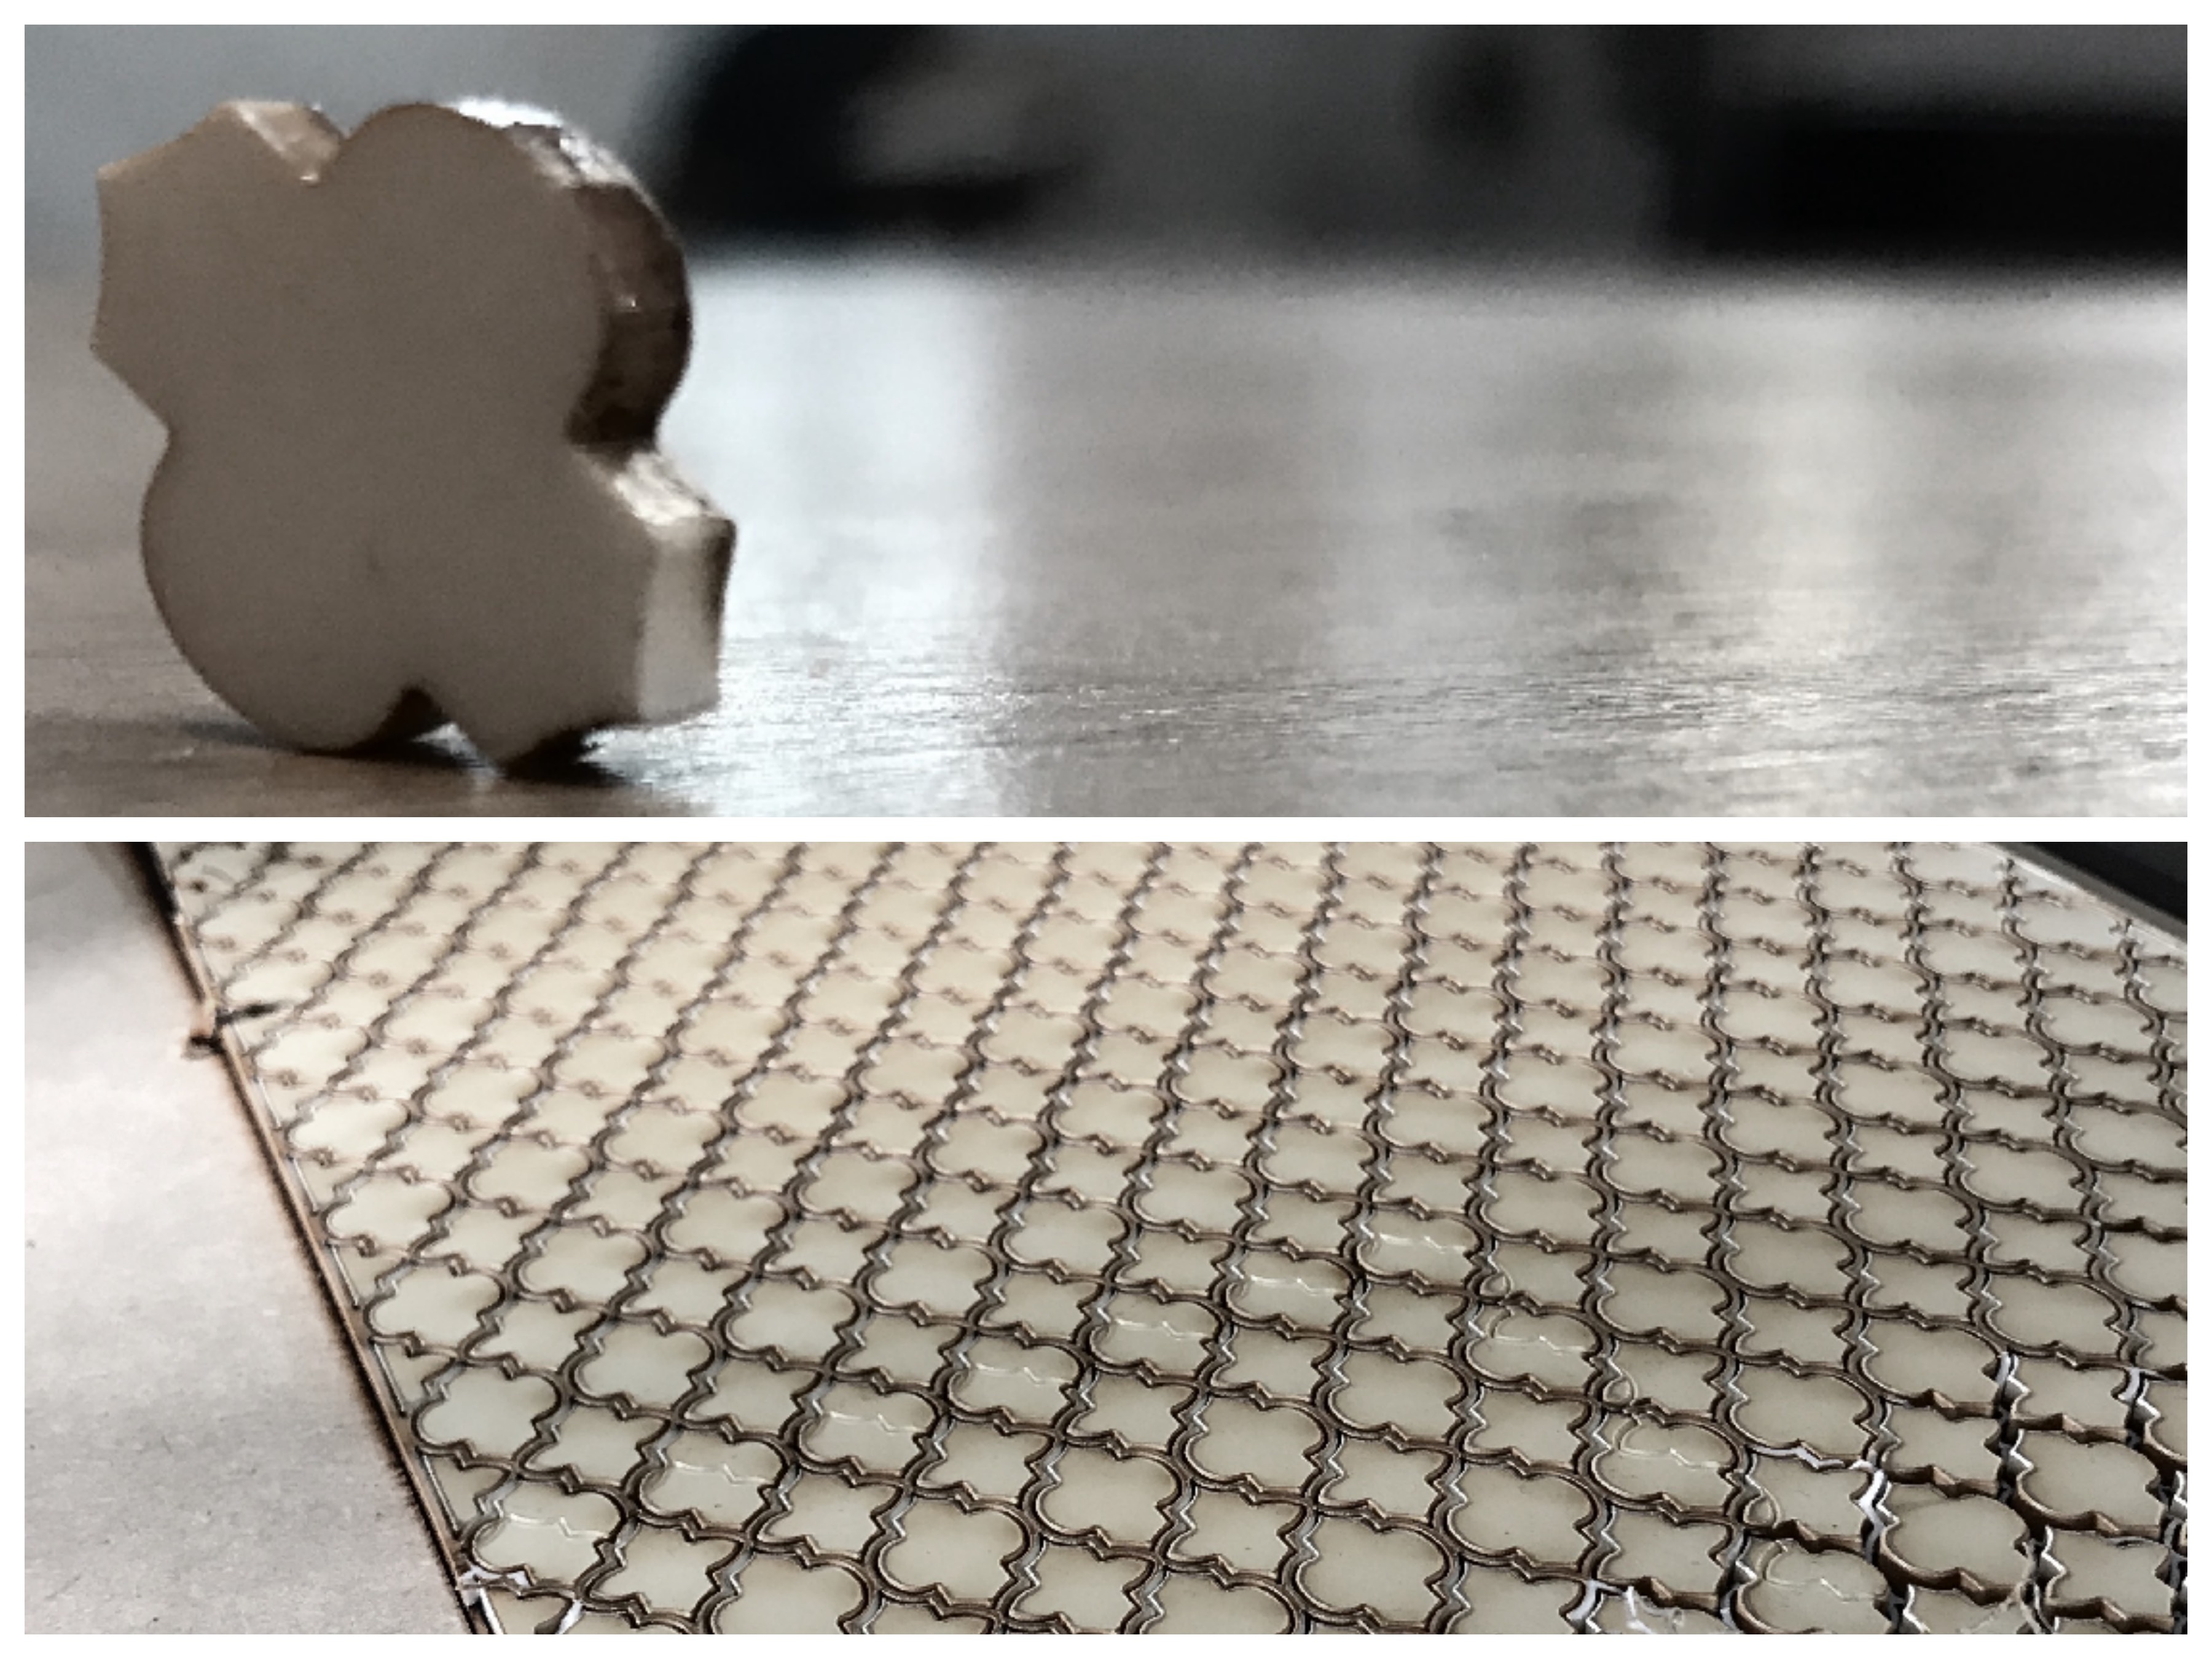
Next step, I lasercutted all those small pieces. If you look very closely at the edge of the pieces, you'll see that the sides are colored with a coffee king of fading color and also that the translucid pieces look like smoked glass. Well, I did that on purpose! To do that, I put an MDF plate under the main material while cutting. Then, I put a little bit too strong cutting settings so that the smoke generated by the MDF would tint the acrylic. To do that, it is important to make sure to cut a little bit in the MDF place but not too much. If it passes through, the smoke will pass underneath if not, the smoke will come up. Here the settings : Power : 100; Speed : 0,4; Frequency : 2000
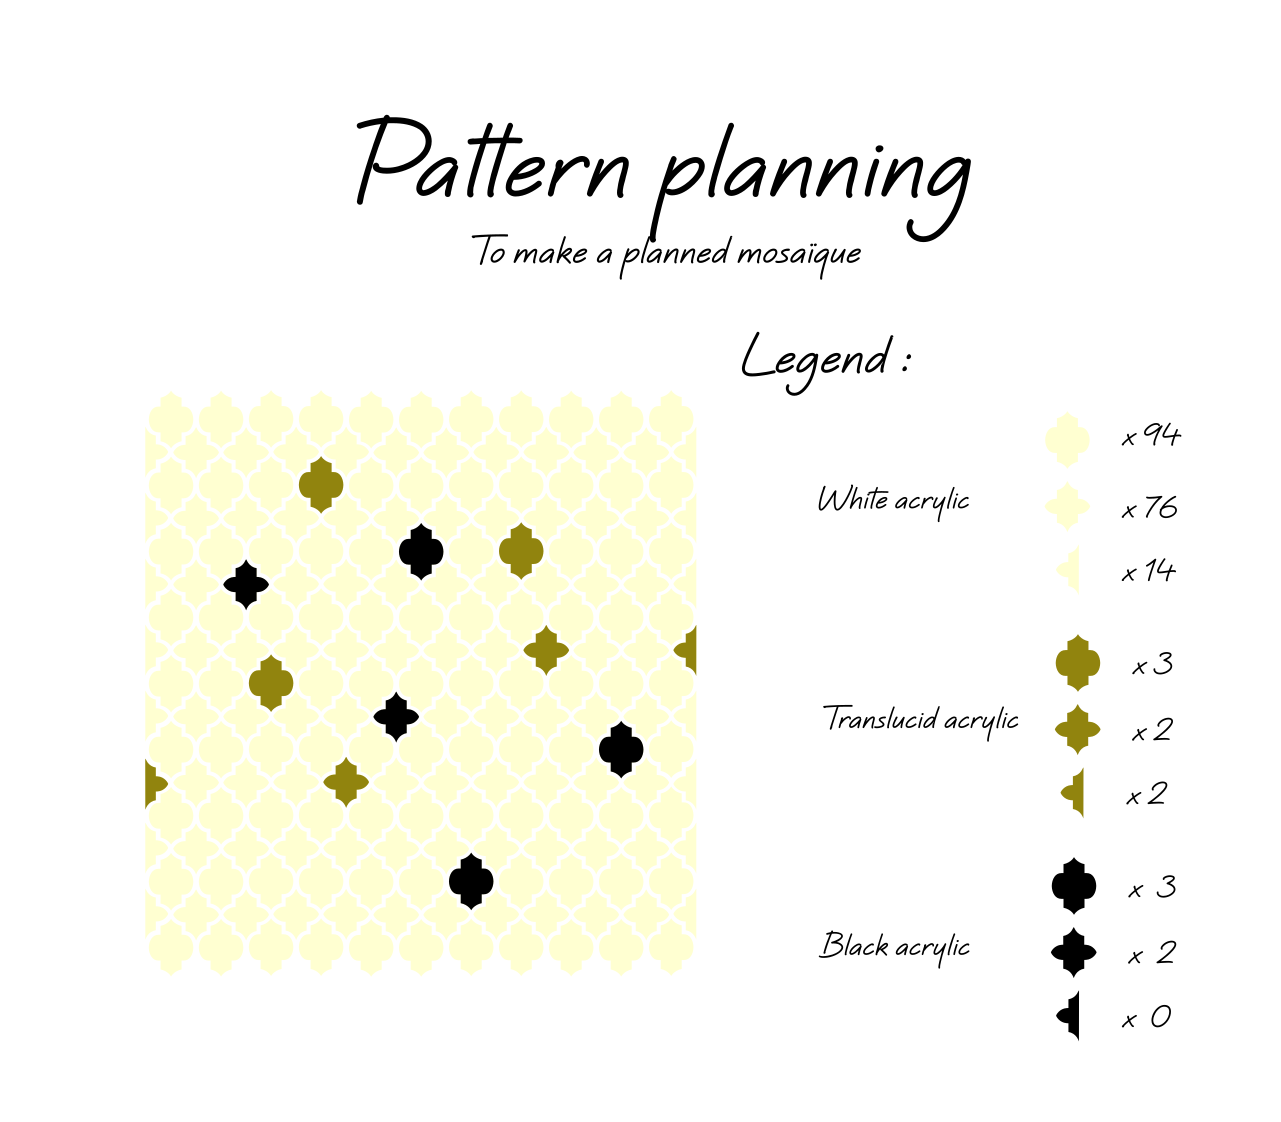
I made a pattern planning file to test the result before doing it. I guess it's good practice to do so. Well, at the least I find.
Almost done! I had to prepare the main textile. I first thermo-glued a strong interlining. I do that so the textile becomes thicker and can be manipulated by many people. The projects will become demos and my first demos are all broken now so I try to make better and stronger demos. Moreover, it prevents the textile to frayed.
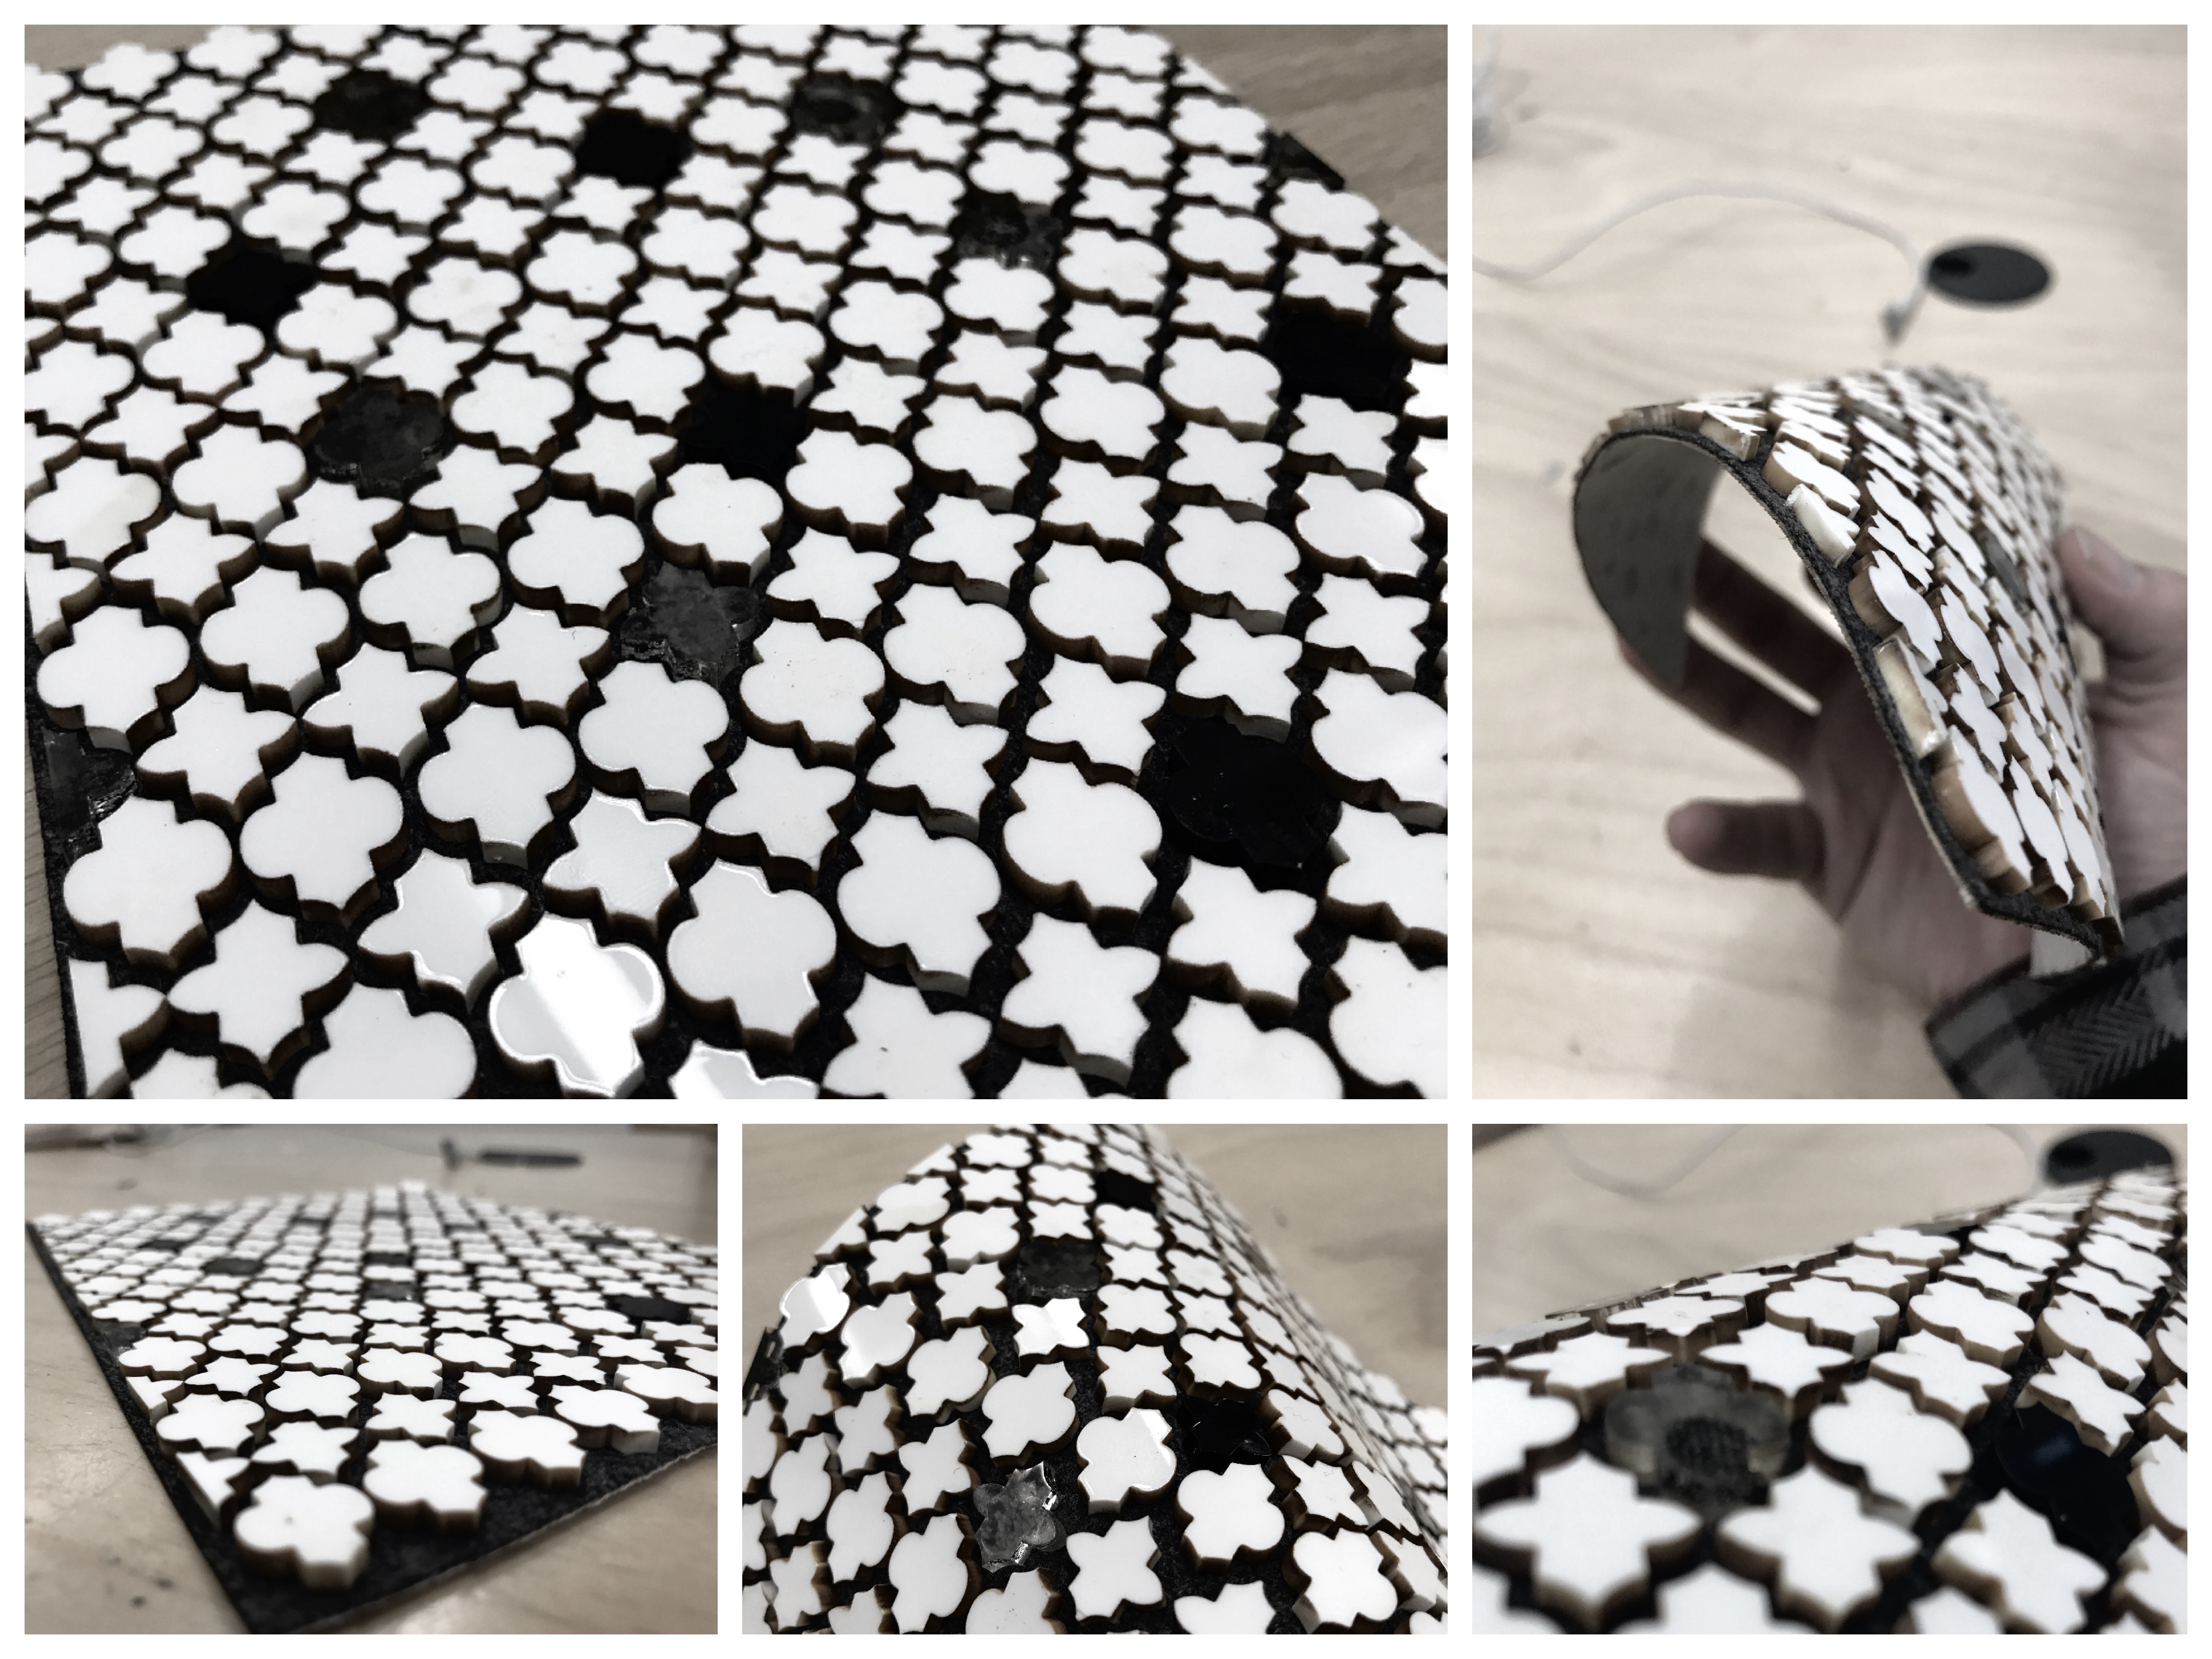
Finally, I glued all of the pieces on the textile with crazy glue. The final result is nice but looks like a kitchen backsplash.
Flexible or soft acrylic #2
Because the lecture was sooo inspiring, I had to explore another technique at the least !!! So, I made another project. This time, my goal was to transform the textile an make a new material with it more than assembling pieces together. I then decided to make a textile mask. No reason behind! I then inspired myself of the composite technics I learned in this lecture.
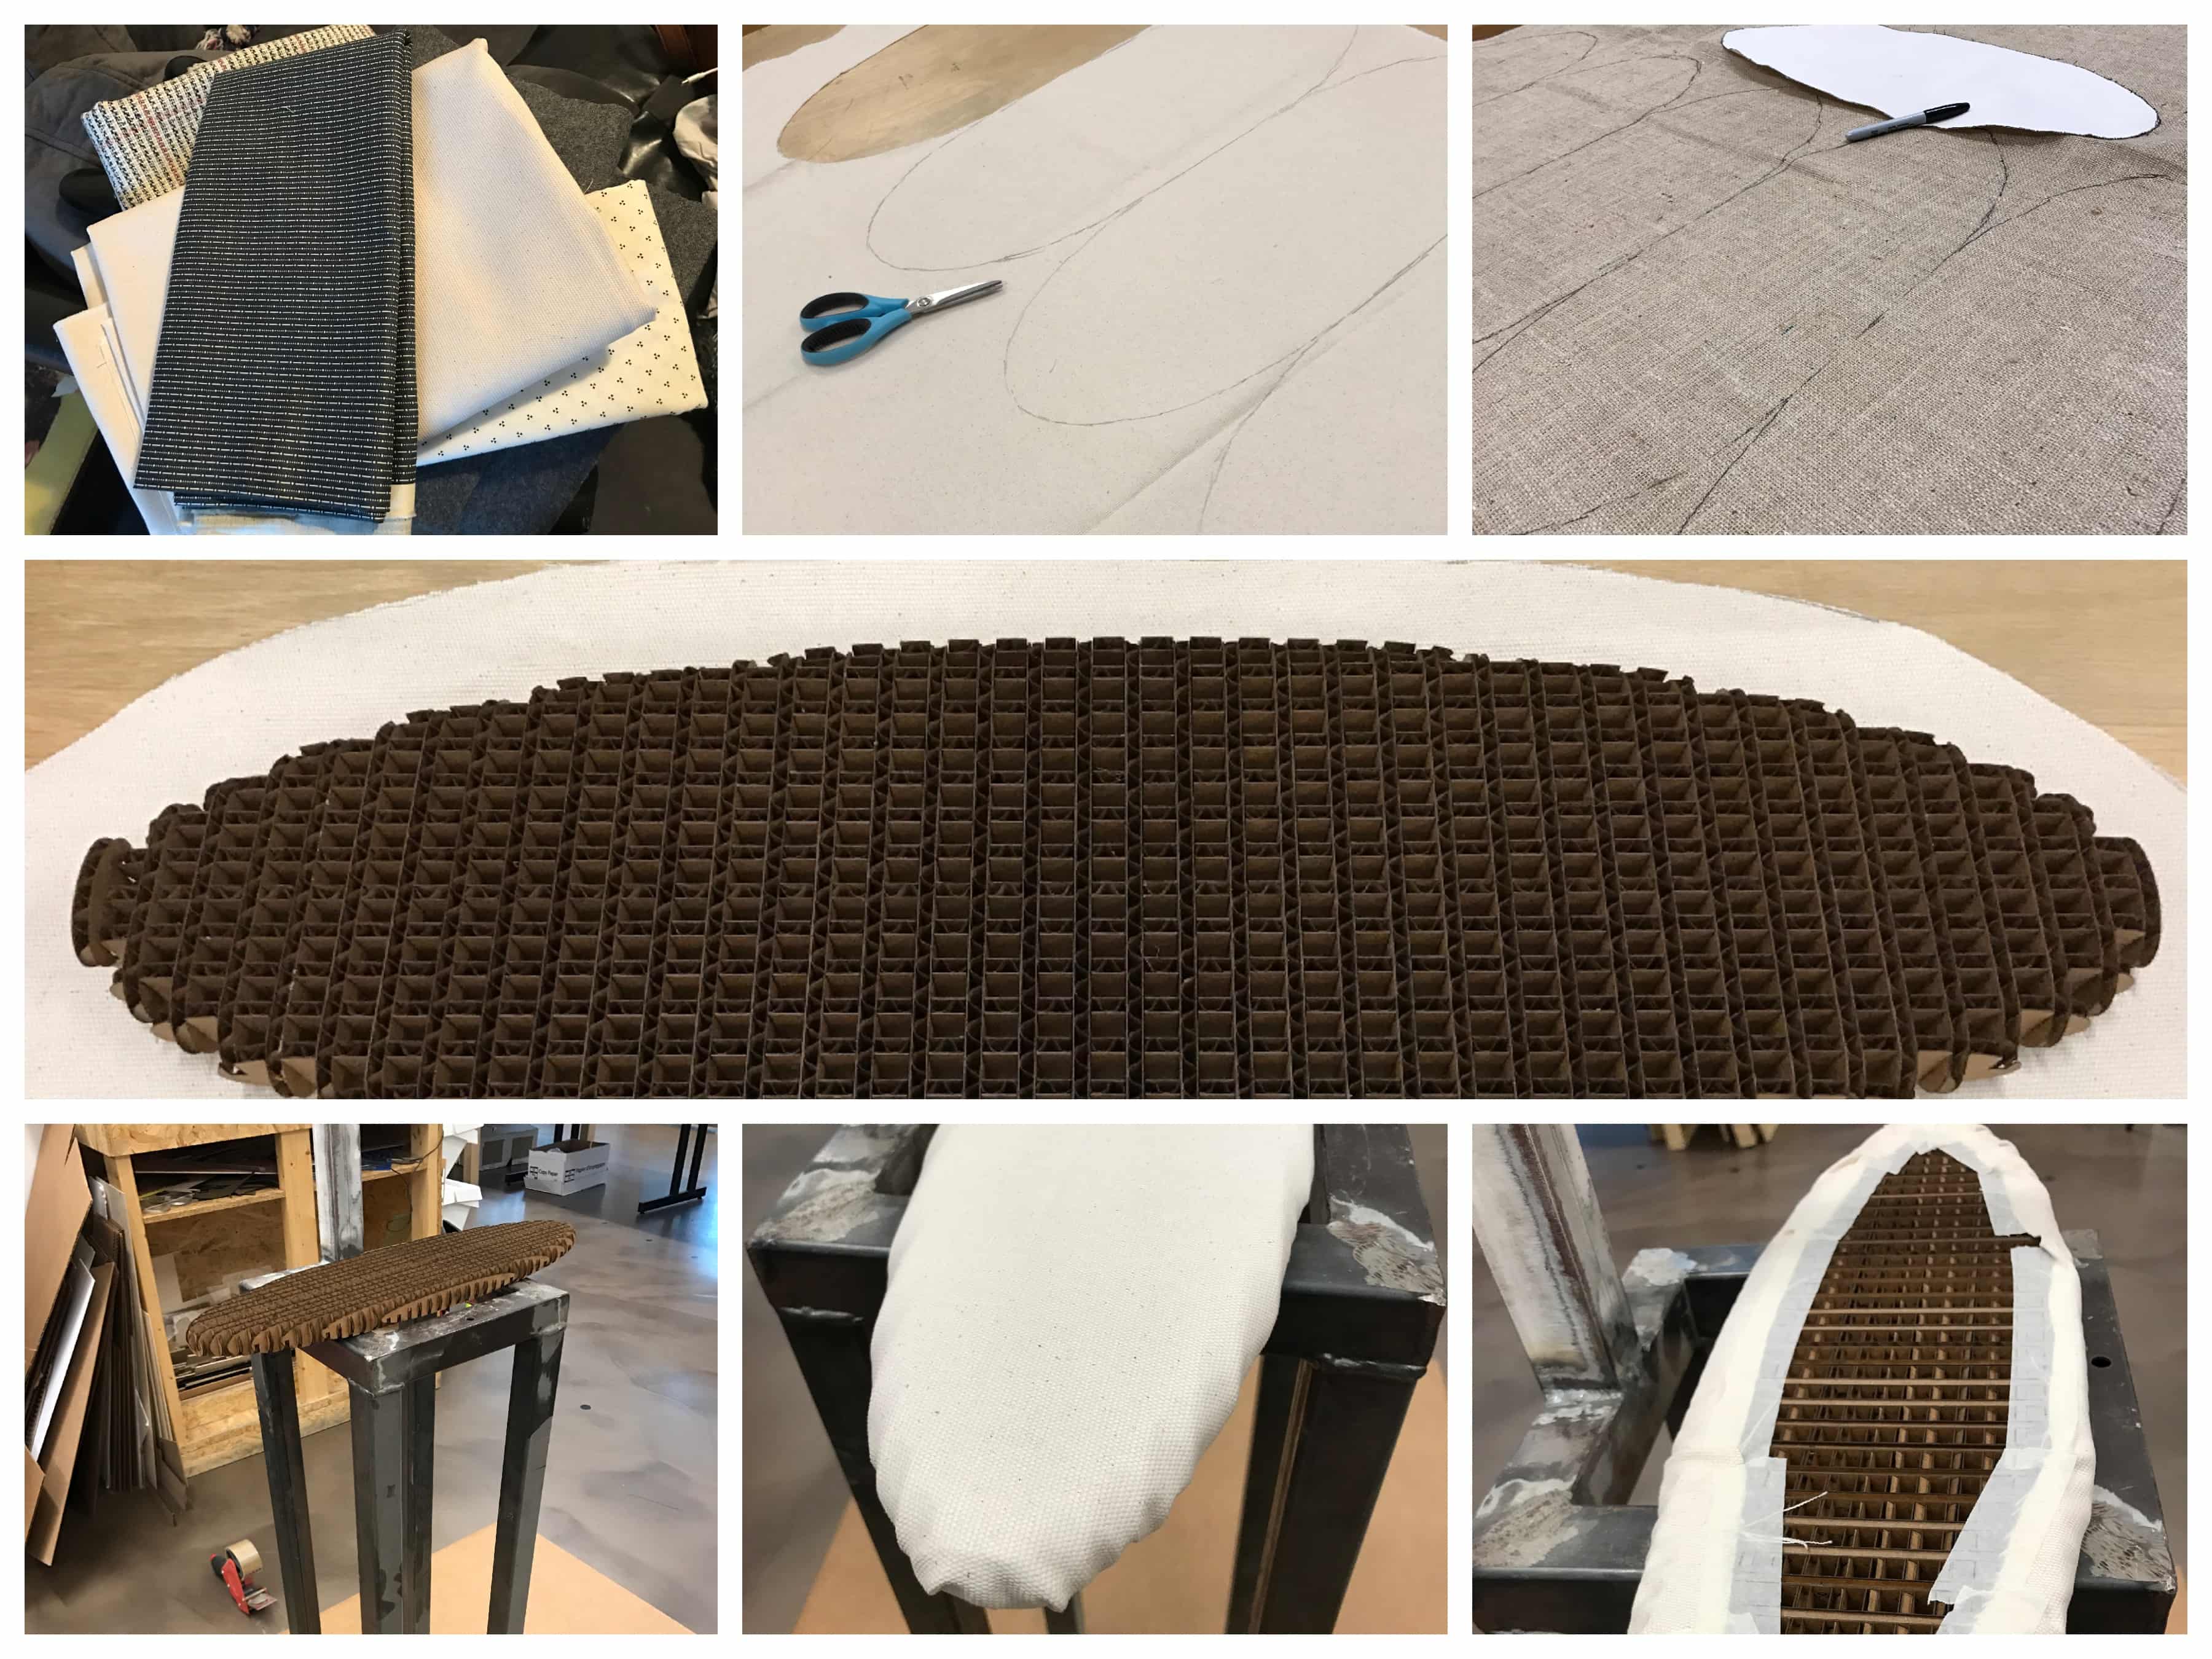
The first step then was to find all the right material for the project :
- A piece of textile (about 50cm x 50cm);
- Masking tape;
- Aluminum foil;
- Small piece of cardboard (about 10cm x 50cm);
- Headed pins (about 25);
- White all purpose glue;
- Liquid acrylic;
- Latex gloves;
- A practice head for hairdresser.
It is very important to prepare well the space when you work with a messy and liquid material. The lab is a public space! I put aluminum foil that I taped on the table and made it my working space. When we do molding with silicon or with liquids that become thick we use aluminum because it's completely unporous. Then I reunited all the material to not have to move around doing the job.
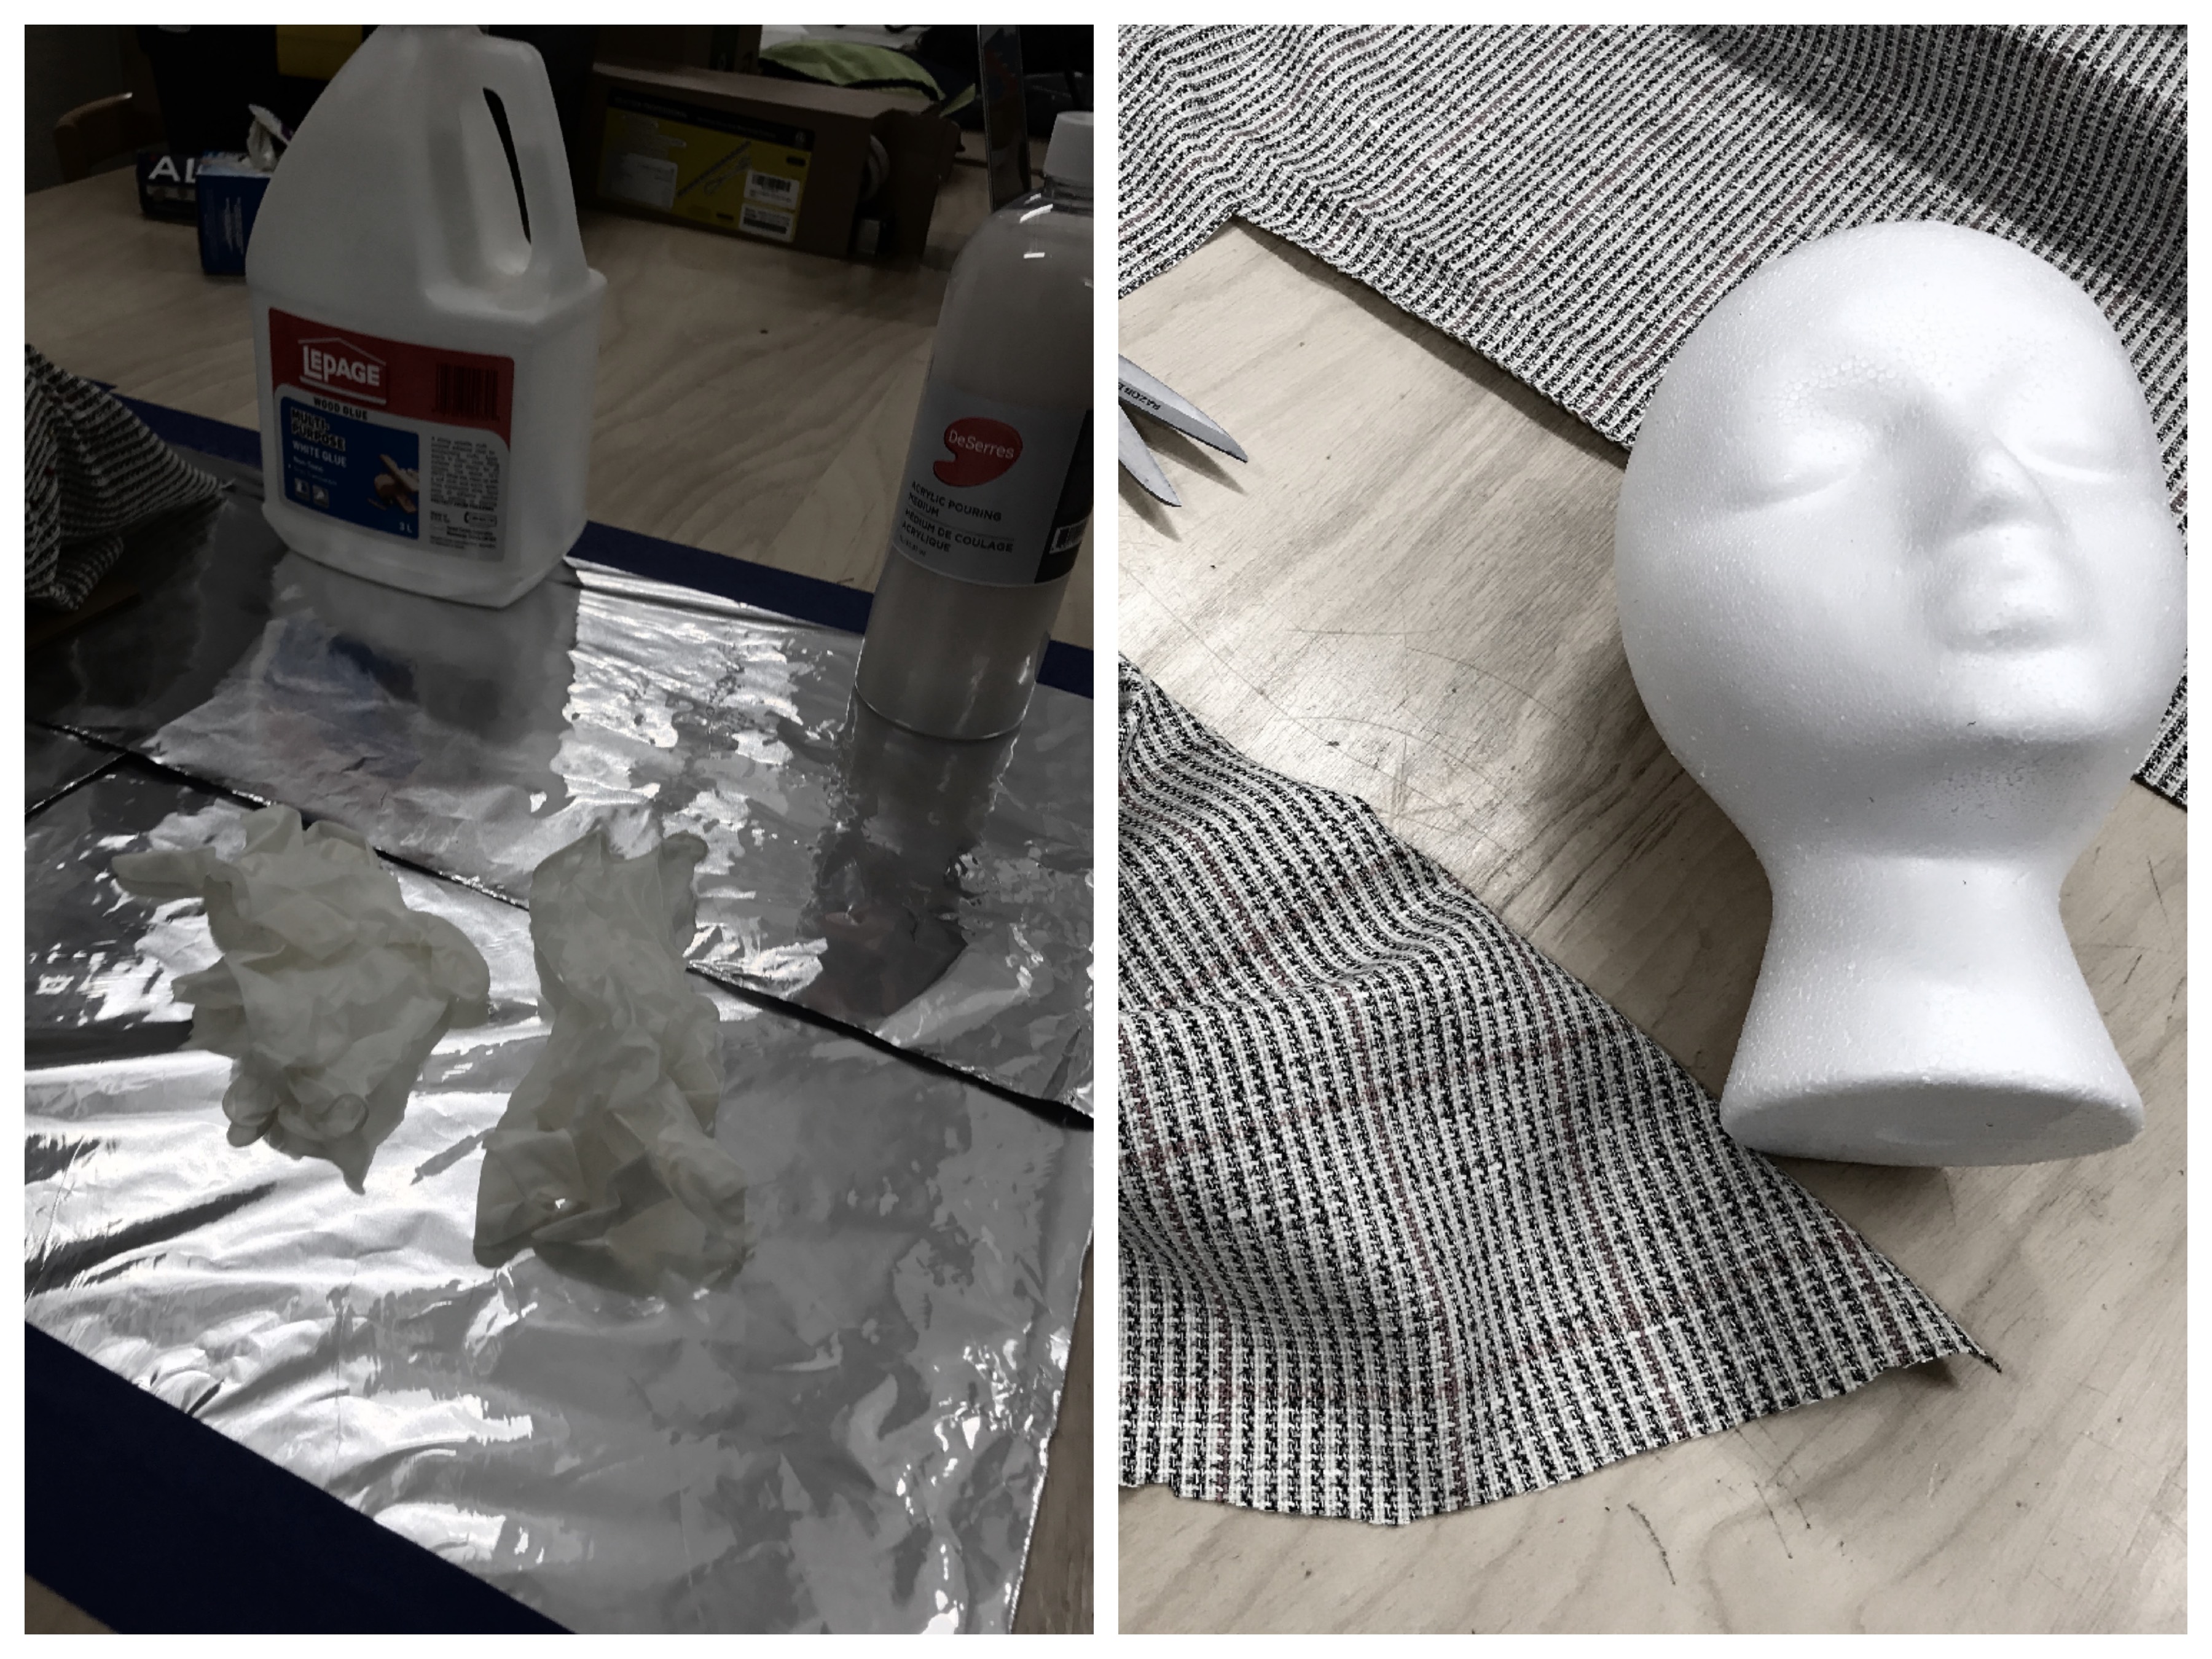
The first step is to wrap the material around the head I got. If the material is not stretchy, you'll have a very hard time getting it around the heard in a clean way. For that, you have to use it with the diagonal. I made a little diagram to show what I'm meaning. Then, put some pins strategically so the fabric does not move while putting some product on it. Then I put a thick layer of white glue all over.
I let the whole thing dry for 24hours. I came out super hard and perfectly in shape. I unmolded it and cut the shape around. It was hard as rock !
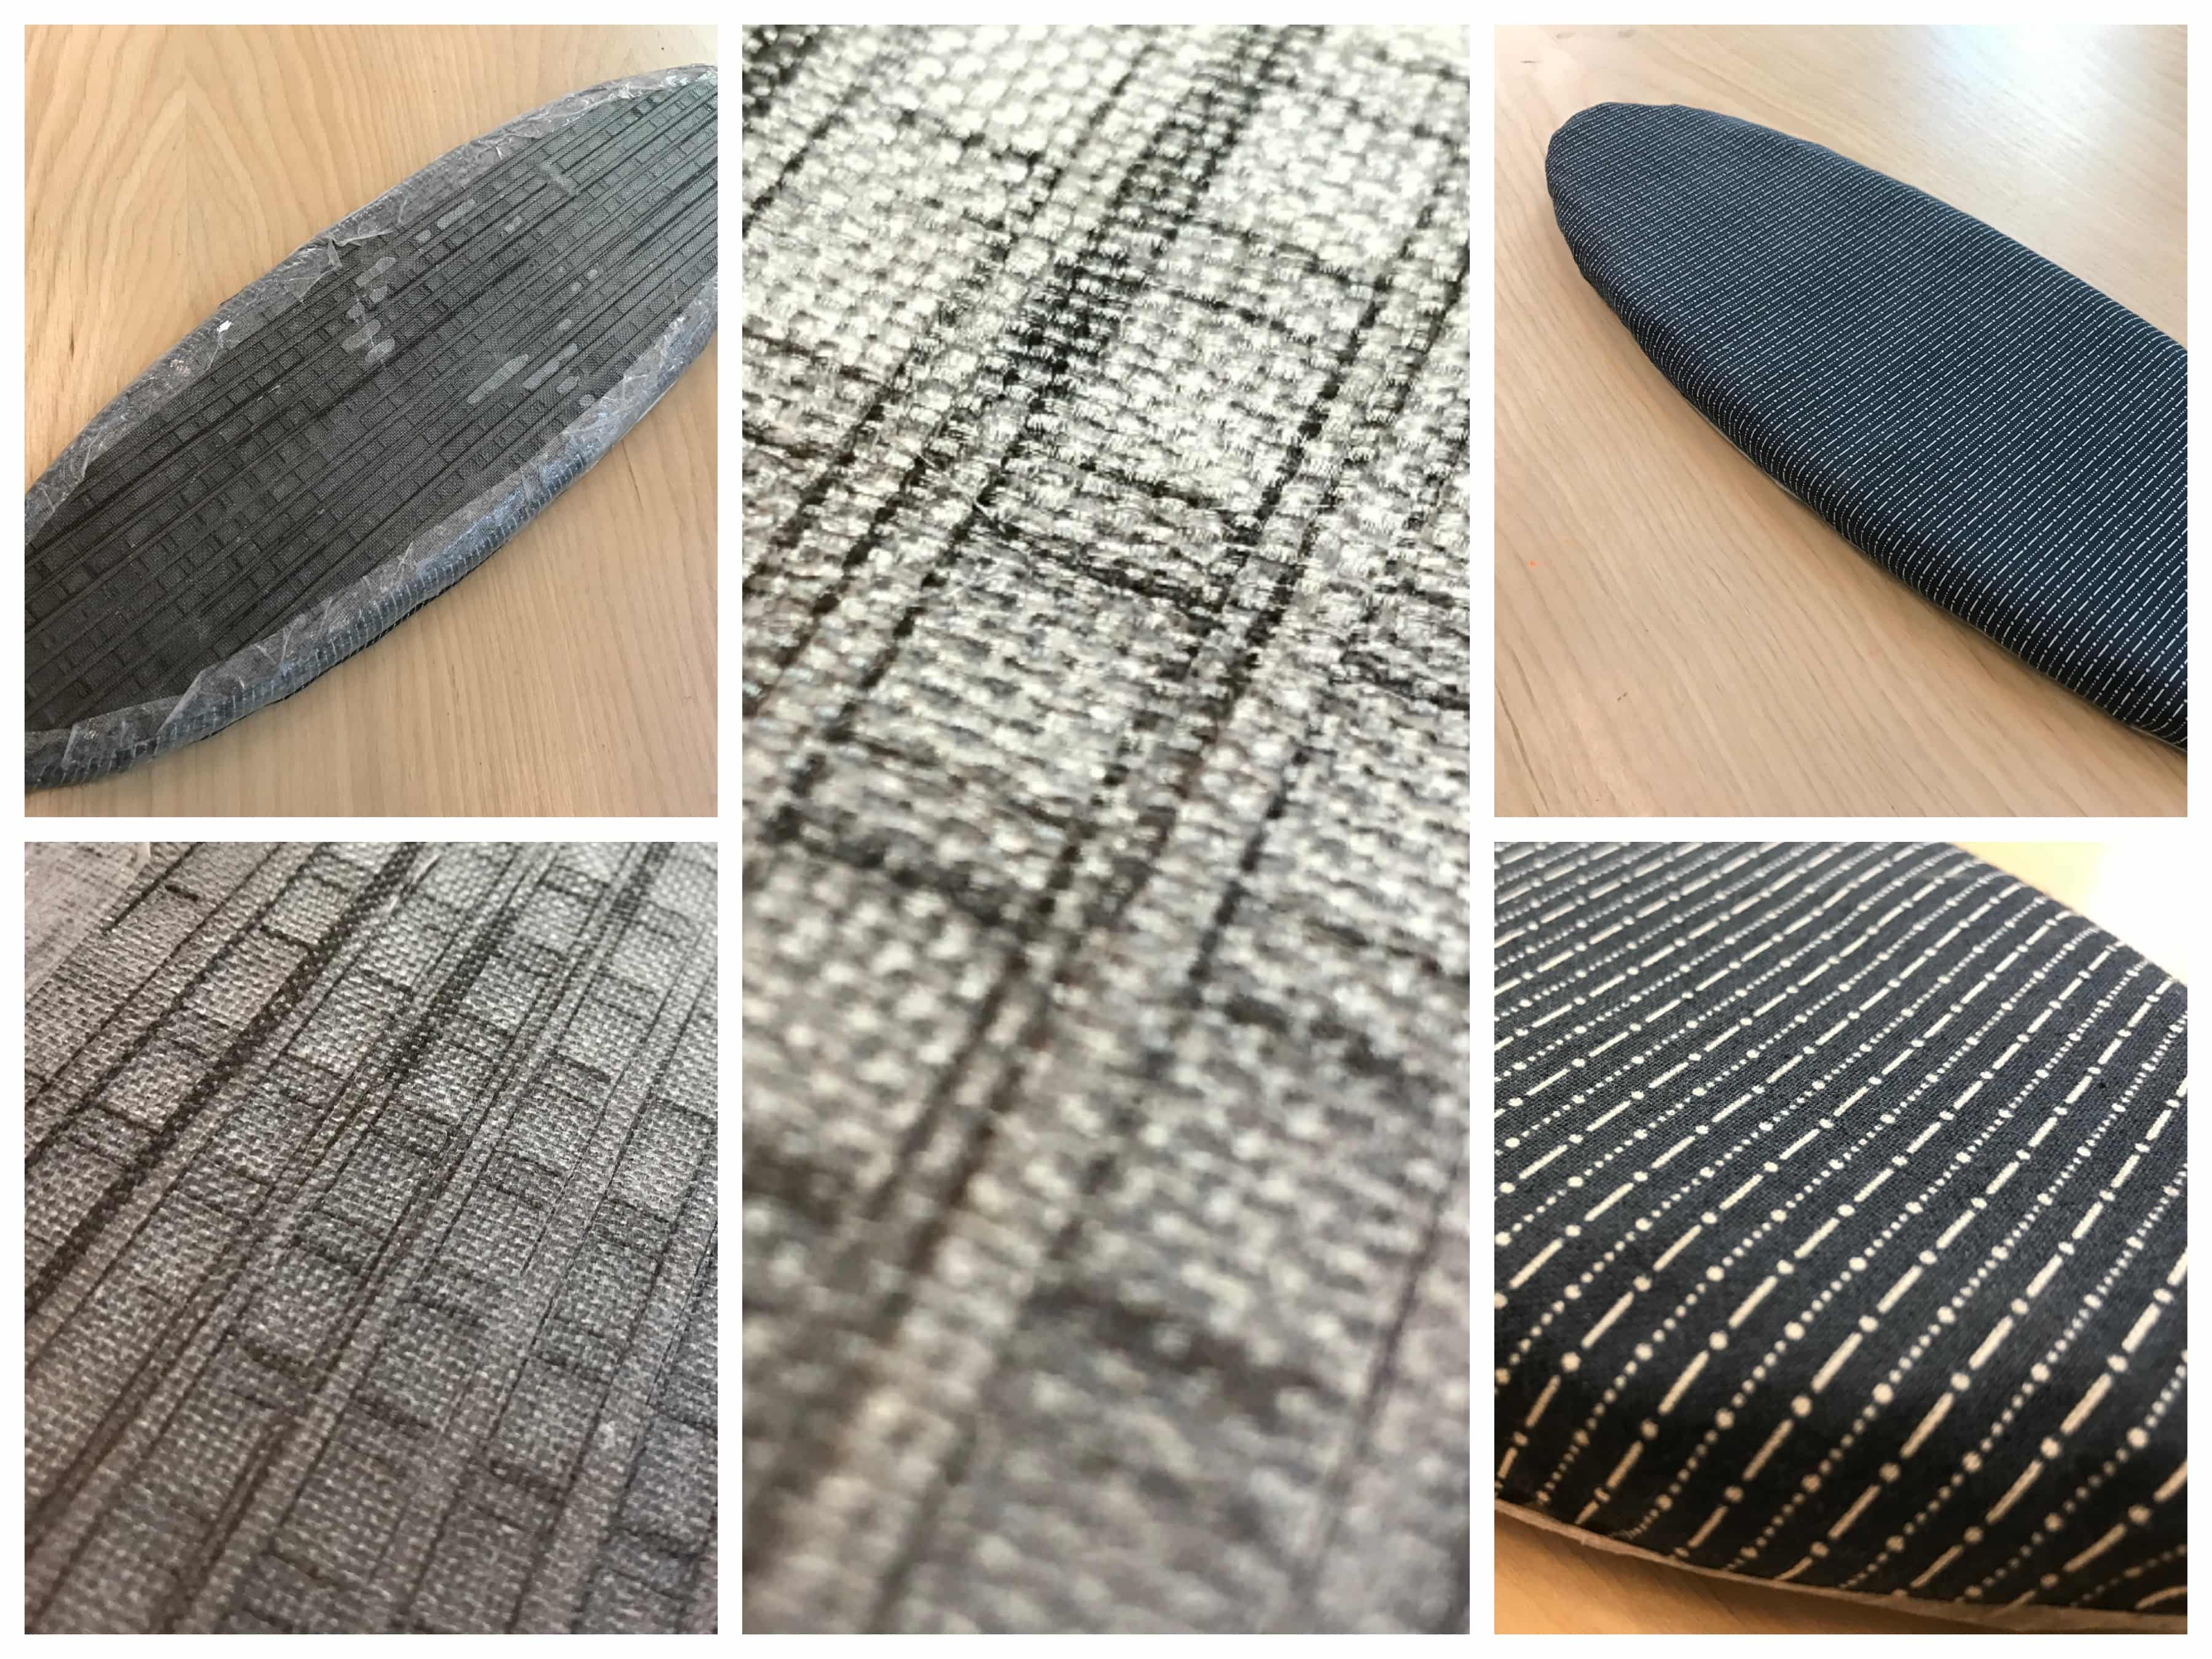
Then, I put the liquid acrylic on it. The objective of this product was to make it shiny but it also did a surprising reaction with the glue. The object kept its shape but became kind of flexible too. That's definitely awesome! Unexpected but awesome! The final result is pretty cool. I'll use that technic later on with my final project to make a dark and weird headpiece.
Hard composites
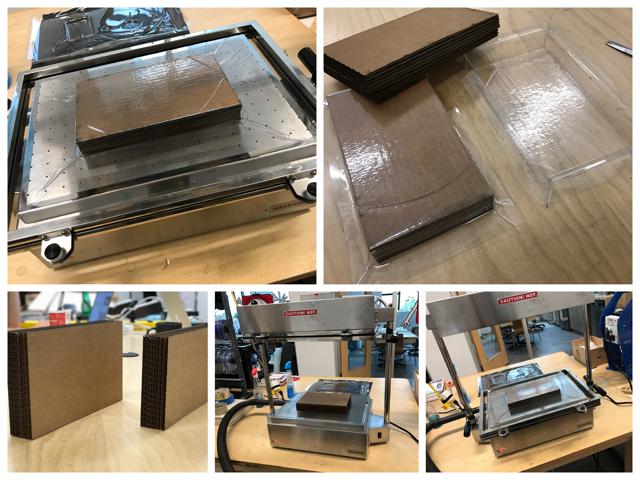
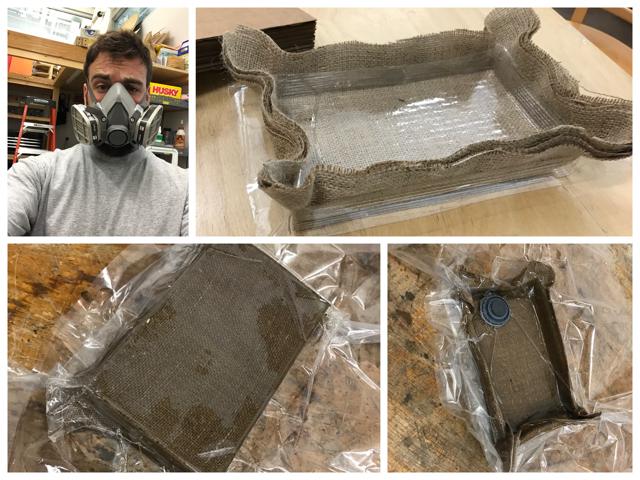
Not during this program, but this summer I explored two ways of doing composites with textile. One with natural fiber and another one with fiberglass. I thought it'd be nice to showcase them here. I'm not going to go into detail with how I did them because time passes fast and I'm already late with all my assignments. But still here are some photos and don't be shy to poke me for more information about them!
1.Composite sample with natural fiber
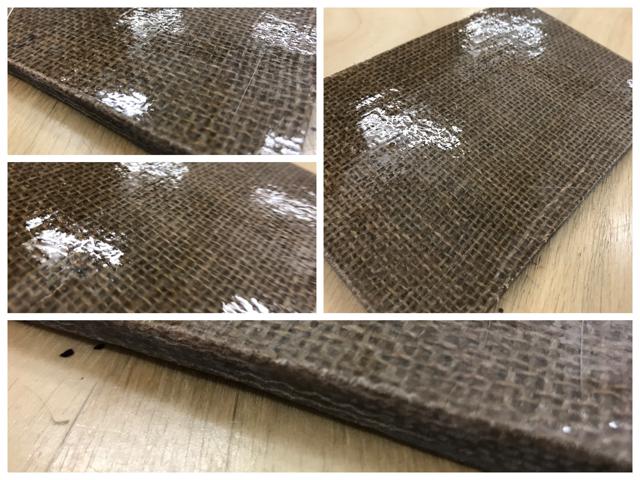
I made this first project during Fab Academy last year and I used a natural fiber with expoxy resin using a vacuum bag to make it. The result is pretty clean but working with epoxy is messy to say only that.
2.Composite sample with fiberglass
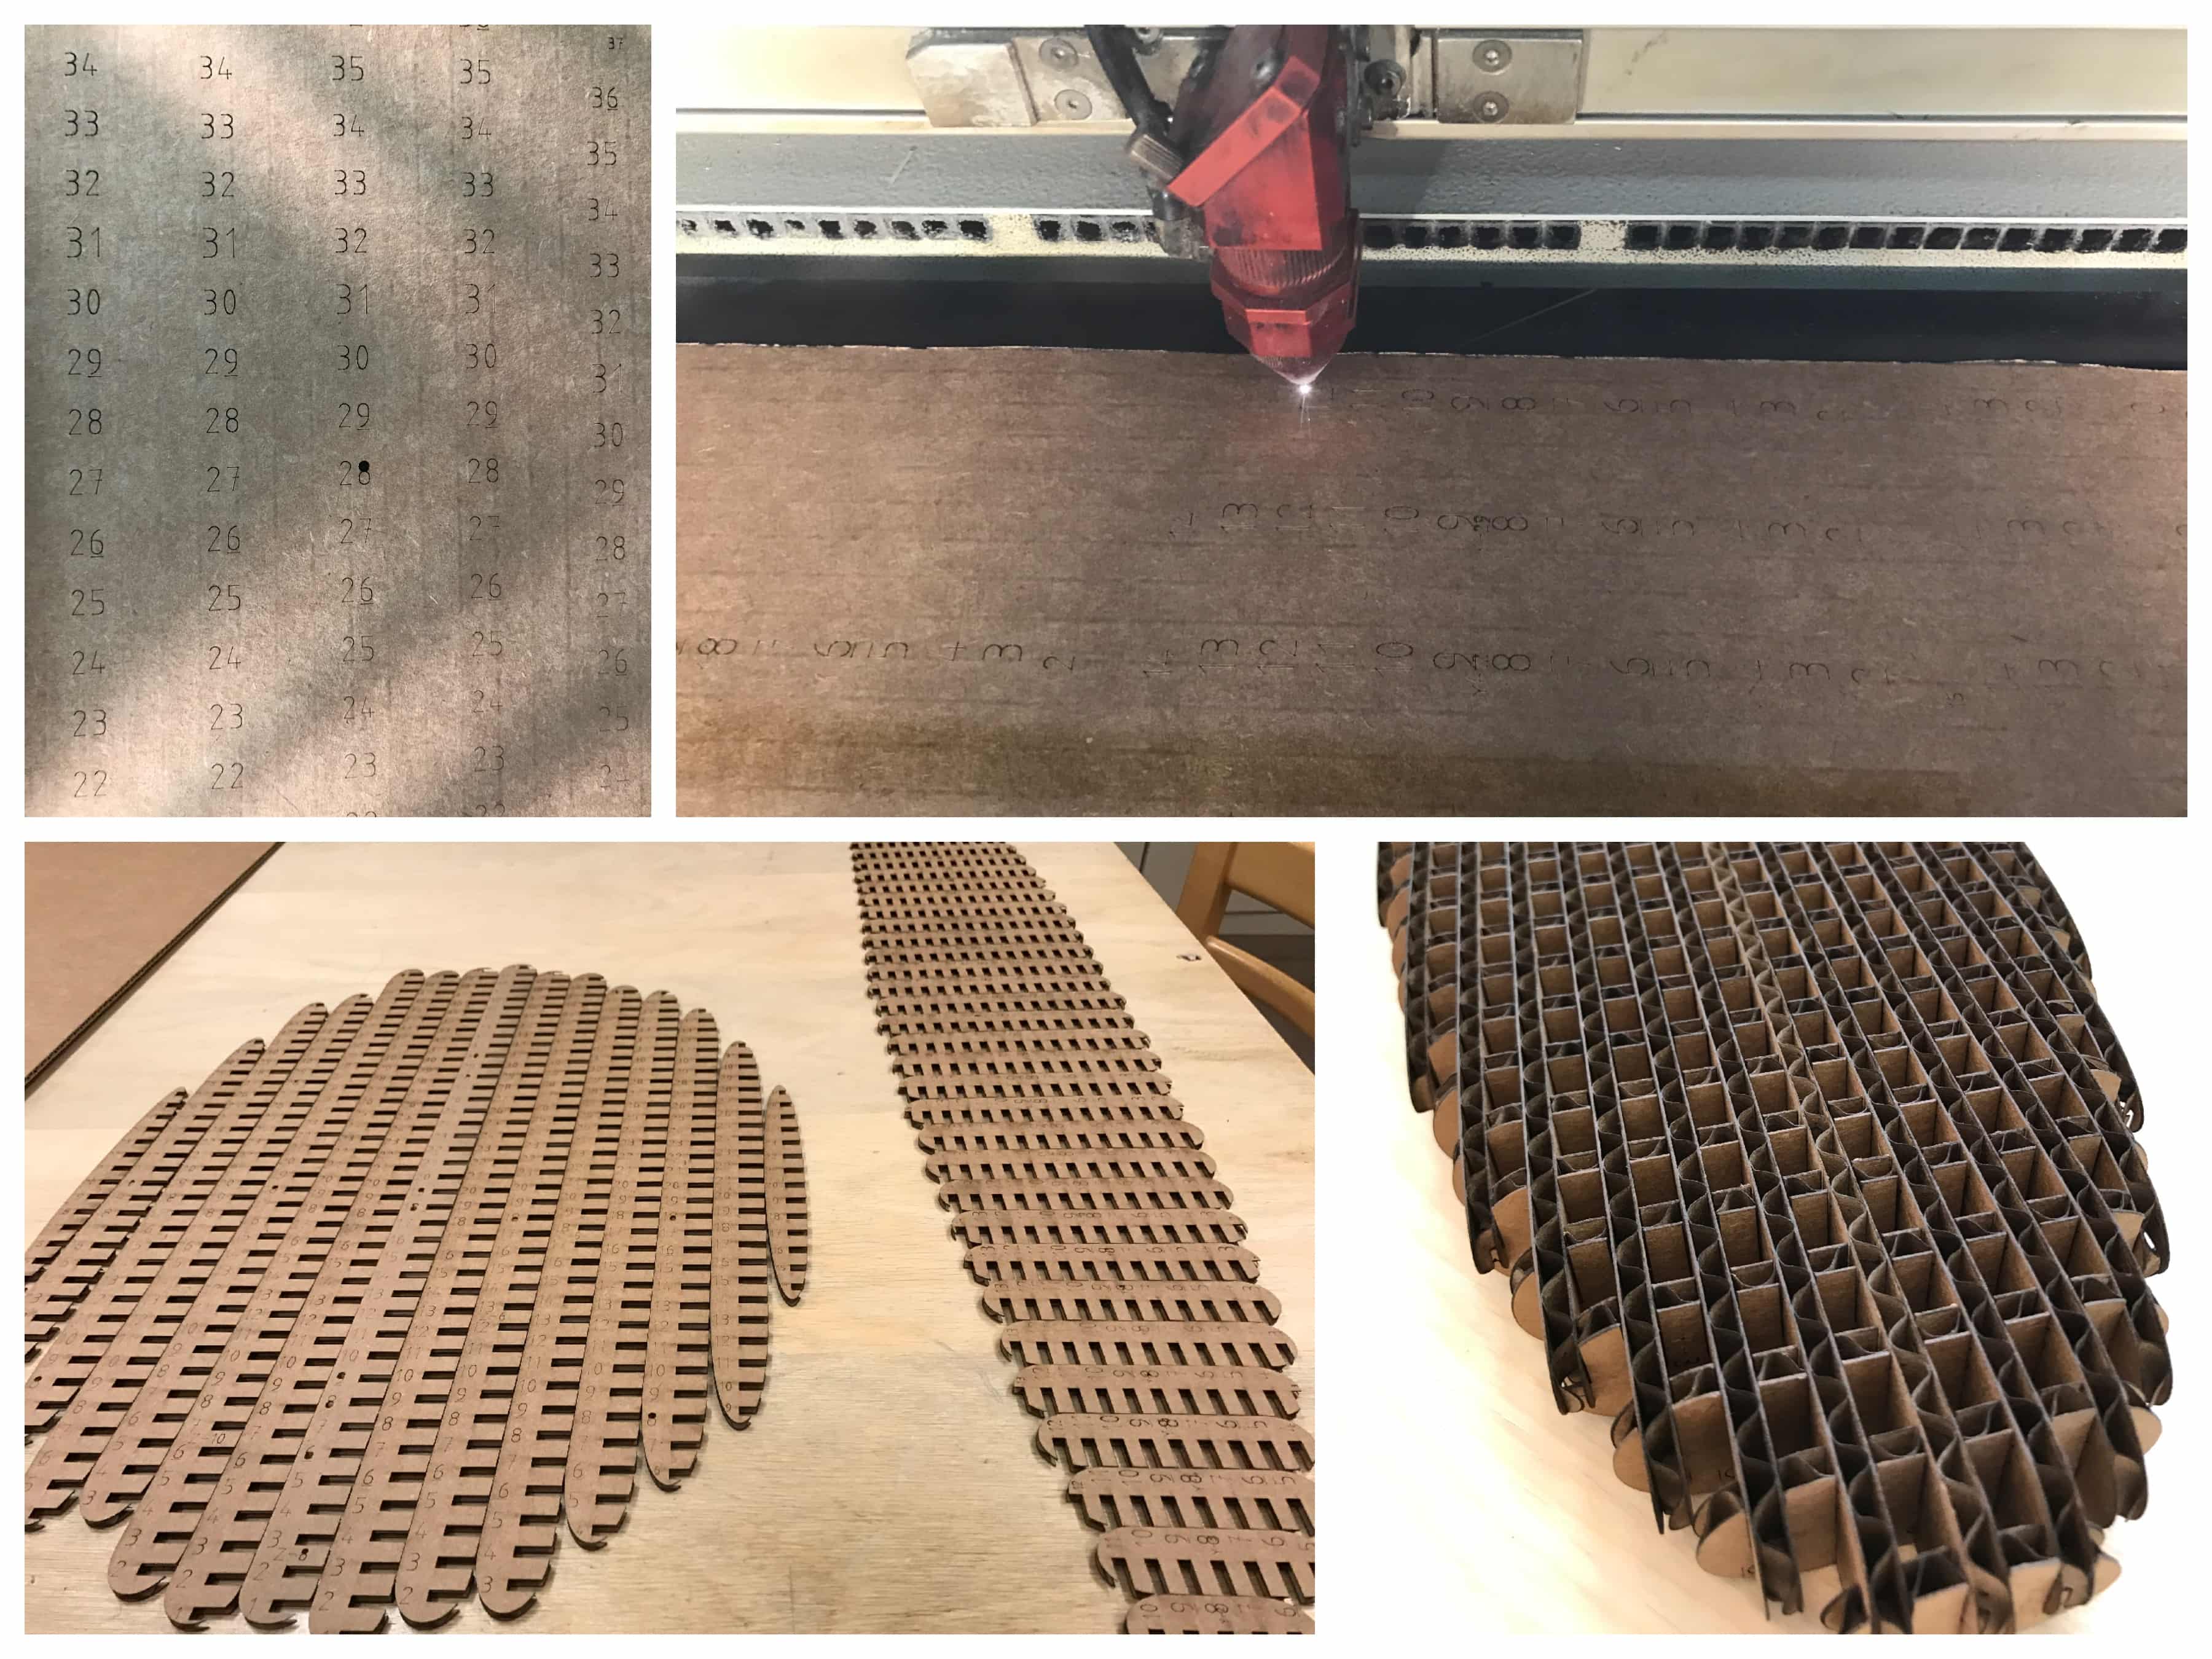
With this other project, I wanted to make a small protoype of a surfboard. It worked well and the result was pretty neat.
What's next !?!
In the future, I'd like to explore molding concrete with textile and also try crystallization processes. I thought that was also very inspiring technics.